Showing posts with label Cooking. Show all posts

Tuesday, April 14, 2020

Cupcakes!

We're not big cake eaters around here.  So, I make cupcakes.  A cake mix makes a lot of cupcakes!  

What I do so I don't waste is once I make them, I don't ice them.  I put them in freezer bags.
e

I just take out the number of cupcakes we want and put on a plate to thaw.

In about 20-30 minutes, they can be frosted.  You can make frosting, but when it's on sale/clearance, I'll buy some to have on hand.  Today in the pantry, I found this:

So, about 20 minutes after the hubby says "Do you have anything sweet, a cupcake sounds good", you have these:
Yes, there is one less than when I sat them out to thaw, the hubby grabbed one as soon as I iced the first one.  

As a reminder....check on your neighbors.  No, don't go over there during a shelter at home, but call them, text them, Zoom with them.  It's good for everybody!

Thursday, January 9, 2020

We're going to eat better, dang it!

In the last couple of years, I really thought I was shopping smart.  And I was...if I'd been properly planning on how to use what I was buying.  And I wasn't.  I'm ashamed to admit, I wasted a lot.  And we ate out far too much!

At one point, I even went out and bought one of those FoodSaver machines to stop the waste.  Yes, it is wonderful for preserving food in the freezer and preventing freezer burn, but if you don't use that food, it's still not truly helping.  I mean the food isn't going bad but it still wasn't being used.  The FoodSaver is great for things besides meat.  As with Ziplocs or anything else that goes in the freezer, label and date everything!

I was off work between Christmas and New Year's and really put a lot of thought into how I was going to fix things.  I bounced a lot of ideas off of my husband.  I did a lot of Pinterest-ing.  I came to the conclusion that I really couldn't do anything until I knew what I had.  Do you dread going to dig in the upright deep freezers because you know if you touch something, it's all gonna fall out on your feet?  No?  Just me?  I put on good shoes and went in....

I just started with the big freezer because I knew the little one was where I put the "overflow" and knew it was the newest stuff.  I did not do a full clean out but I did toss some things as I came across those items that had dates I didn't like.  I did have a package of ham hocks land on my foot but the turkey breast missed me!  Ha!  I ended up tossing a couple of kitchen trash bags worth of more wasted food.  I can assure you, that is going to stop!  

I did a quick run down on what meat was in there and then made a list of some meals that I know we like, that in all honesty is what part of that meat was bought for.  I looked over the things I'd pinned on Pinterest and made a list.  

Side note, I love a good list!  Here is the list of meals I came up with:


Yes, I'm old school to a point....paper and pencil lists!  What you see crossed off is what we have used to date.  I figured out what i needed to complete the meals and went to the grocery for pretty much dairy and produce and a few canned goods.  Oh, and I made sure that I had plenty of FoodSaver bags.  

Every Sunday, I make a menu...having the food prep done will definitely help us stick to it.  Here is this weeks:


The Meatloaf isn't really a recipe, it's just something I make.  I used 2 pounds of 80/20 ground beef and 1 pound of ground pork, not sausage just pork.  With that, I add a diced onion, a little garlic, 4 slices potato bread (we use Aunt Millie's 35 calorie potato bread around here so that's what goes in this) torn into little pieces and soaked in about 1/2 cup give or take of milk, 2 eggs, about 6 strips off uncooked bacon cut into little pieces (use scissors, it's easier) and some tomato sauce, about half a can.  Of course there is salt and pepper and some paprika.  I used the other half can of tomato sauce to mix with brown sugar and salt and put on top of the meatloaf.  This made two meatloaves.  I liked the meatloaf pans with cling wrap and put half the meatloaf in each pan and put them in the freezer.  Once they were frozen, I lifted them out of the pan with the Cling wrap and then wrapped the cling wrap around it and then two layers of aluminum foil.  Back to the freezer until ready to use.  When you take the wrap off it just drops back into the pan to cook it.  Bake it for about an hour at 350 or until a thermometer is at 165 degrees.

The French Dip sandwiches are made with some shaved beef I bought at Kroger, it fries up really quickly, like a cheese steak meat.  I toast Ciabatta buns in the broiler.  I put the meat on the bread with provolone on top and back in the broiler to warm the cheese.  Make a packet of au jus and you have a meal in like 15-20 minutes.  We made french fries in the air fryer and I'd made up a batch of Coleslaw on Sunday for two meals this week.  

Gotta be honest, the Chicken Tortilla soup was bought at Sam's for a night that we needed quick...I just tossed it in the freezer so I set it out the night before and it warms up by the time you have grilled cheese made.

The Honey Garlic Chicken was shared by a friend, it's so easy.  The marinade is 1 tablespoon olive oil, 1 tablespoon soy sauce, 2 tablespoons honey, 1/2 clove minced garlic and 2 tablespoons water for every 1/2 pound of chicken.  Mix the marinade right in the Ziploc (FoodSaver bags aren't for liquid unless you freeze it first and then it won't lay flat) then put in the chicken.  Get as much air as you can out of it and seal it lay it flat in the freezer.  This allows you to stack them and it thaws quicker if it's flat.  Move from freezer to fridge the night before and bake at 425 degrees for about 25 minutes.

The taco meat I made, I added some veggies in it to add some health benefits to it.  I used the frozen mix of carrots, onions and celery...not a lot but every bit helps.  I also add black beans to it.  When I made it, I doubled the batch and divided in FoodSaver bags.  

Finally, the slow cooker cheese chicken spaghetti is an experiment.  It sounds good and I hope we like it, but it's one of those that make you go hmmmm....Here's the recipe:

16 ounces spaghetti-cooked
1 pound Velvetta Light cheese
2 cups cooked chopped chicken
1 can cream of mushroom soup
1 can cream of chicken soup
1 can petite diced tomatoes
1 4 ounce cans mild green chilies
1 cup mushrooms chopped
1/2 cup water
1 small onion diced

Combine all in a gallon Ziploc bag, seal, flatten (as you can, it's a lot in that bag) and freeze.  When ready to use, thaw for 24 hours then pour in a crock pot for 2-3 hours.  Stir before serving.

Now, I didn't use cream of soups....I made a white sauce (equal parts butter & flour and instead of milk, I used chicken broth) it's healthier.  

There is week one of the menu.  I worked about 5 hours on Sunday to put together 29 meals that should not take long to make on a week night.  

This is longer than I expected but I wanted to at least share where I started.  I'm going to be as brutally honest as I can in reclaiming our home and diet!  This whole journey of balancing working these particular full-time hours, eating decent meals, and trying to keep my house somewhat decent is going to be a process.  Let's hope this makes it not so painful!  Thank you for reading!

Wednesday, January 20, 2016

Winter Recharging

Hello everyone!  I hope everyone is safe and warm in this first 'snow event' here.  

I love how 2" of snow is a 'snow event'.  I am always somewhat shocked at how people behave when it snows in Indiana.  It's shocking the number of people who run red lights or stop signs, even more so in the snow.  It's as though they don't care whether or not they are in, or simply cause, an accident.  I don't get that.  Then you have what we lovingly refer to as the "French Toast Preppers".  You know, the people who, at the first snowflake, run to the grocery and clear out the milk, bread and eggs.  Personally, I keep at least one half gallon of milk in the freezer and a loaf of bread.  I freeze the half gallons because they're easier to thaw out.  Just make sure you set them out soon enough to thaw for when you need them.  And shake it well before using it.  You can also freeze eggs if you scramble them first.  Well, don't fry them, just whisk them...LOL.  But once you whisk them, you can freeze them in ice cube trays and then when frozen, pop them out and put in a good Ziploc bag.    

I know we're all busy but even though we haven't had a bad Winter, this one seems to be wearing me down.  We have a lot going on and I was just telling my husband that I really need to find a way to recharge.  For me, I think that means I need to bake something.  Actually, that would require being home long enough to bake.  I'll get there.  

I should probably add sleep to that list as well.  Sleep would be good.  I'll get on that just as soon as my reading for my grad school class is done......LOL

As always, please check on your neighbors, the elderly and the shut-ins.  Make sure they're alright and not in need of any help.

Saturday, November 21, 2015

Fried biscuits and apple butter

This morning in Indiana, we have our first snow flakes falling of the season.  November 21st and we're just now seeing snow, not anything accumulating but a few flakes here and there.  We're lucky we've gotten this far into the season without seeing more!

In our home, there are only a couple of things that truly say breakfast comfort food, biscuits and gravy and fried biscuits and apple butter.  We find there are a lot of people who haven't had the wonderful luck to experience fried biscuits and apple butter.  If you are one of these people, you should correct that situation, immediately!

The best thing about this, besides the warm & fuzzy childhood memories, is that it is quick and easy and the kids absolutely love it!

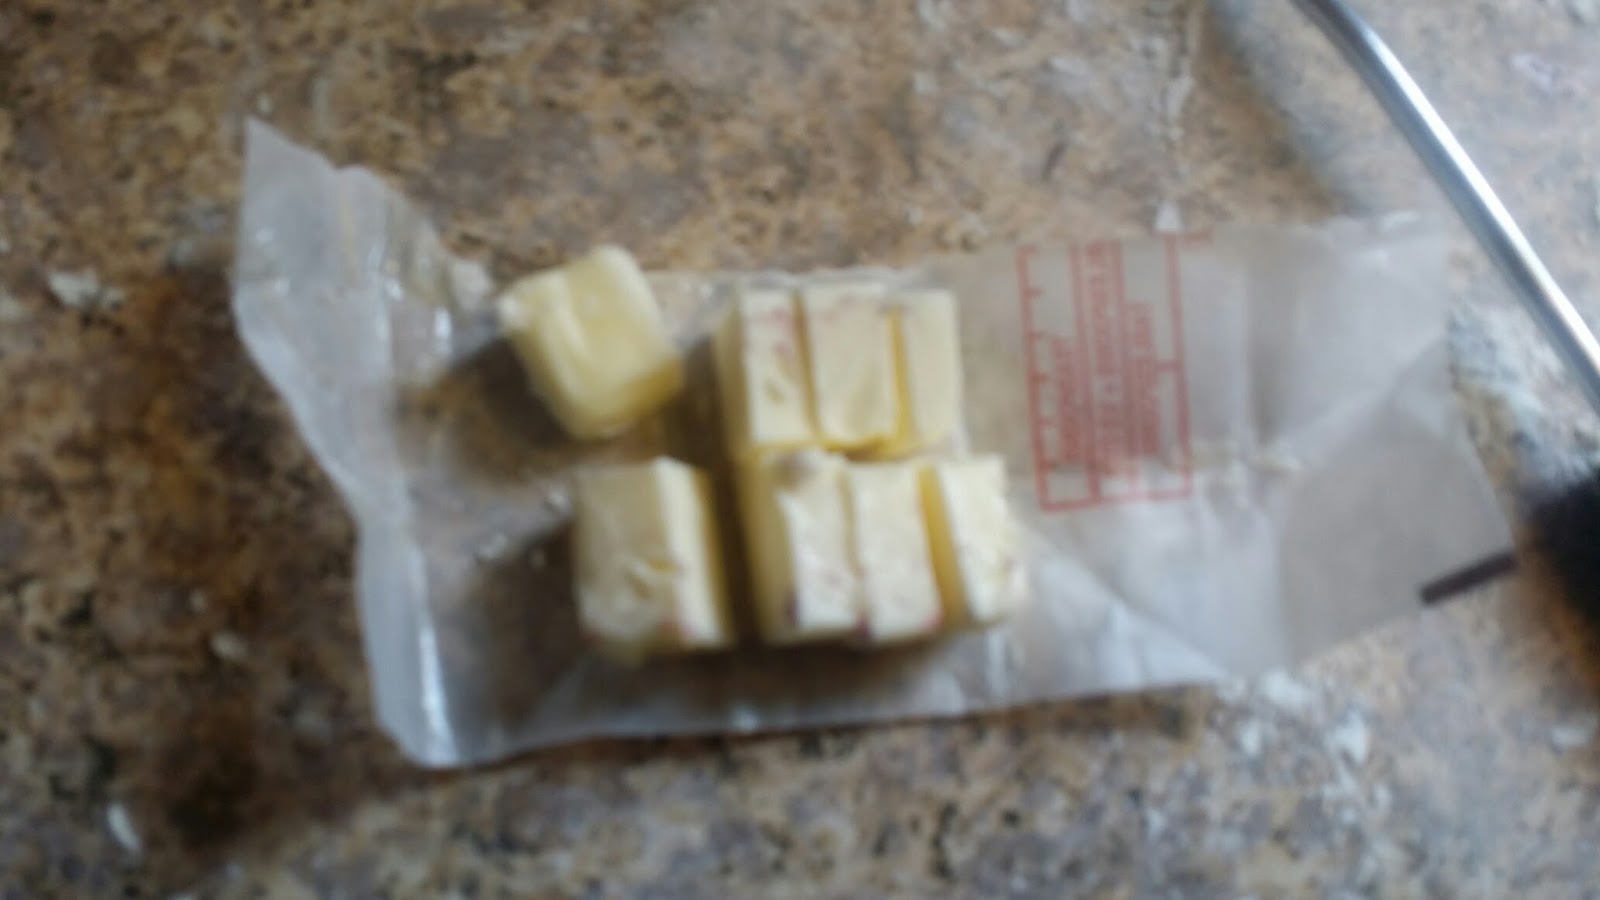
Usually, I make homemade biscuits for everything except fried biscuits and monkey bread.  They both seem to have a better end result if you use the canned biscuits.  And usually, the cheaper the can of biscuits, the better.  

I generally get whatever is cheapest, I had a coupon so I started with these biscuits today.


That is apple butter that I make, you certainly can use store-bought apple butter but, honestly, if you can get your hands on homemade apple butter (even if it's not Gram's Jams), please do so!  You'll thank me.

Other than oil, that IS the ingredient list.  Biscuits, Apple Butter and Oil.  You don't even have to measure.  You do have to cut the biscuits into little pieces.  Well, you don't have to, but there is more crispy surface to the biscuits if you do.


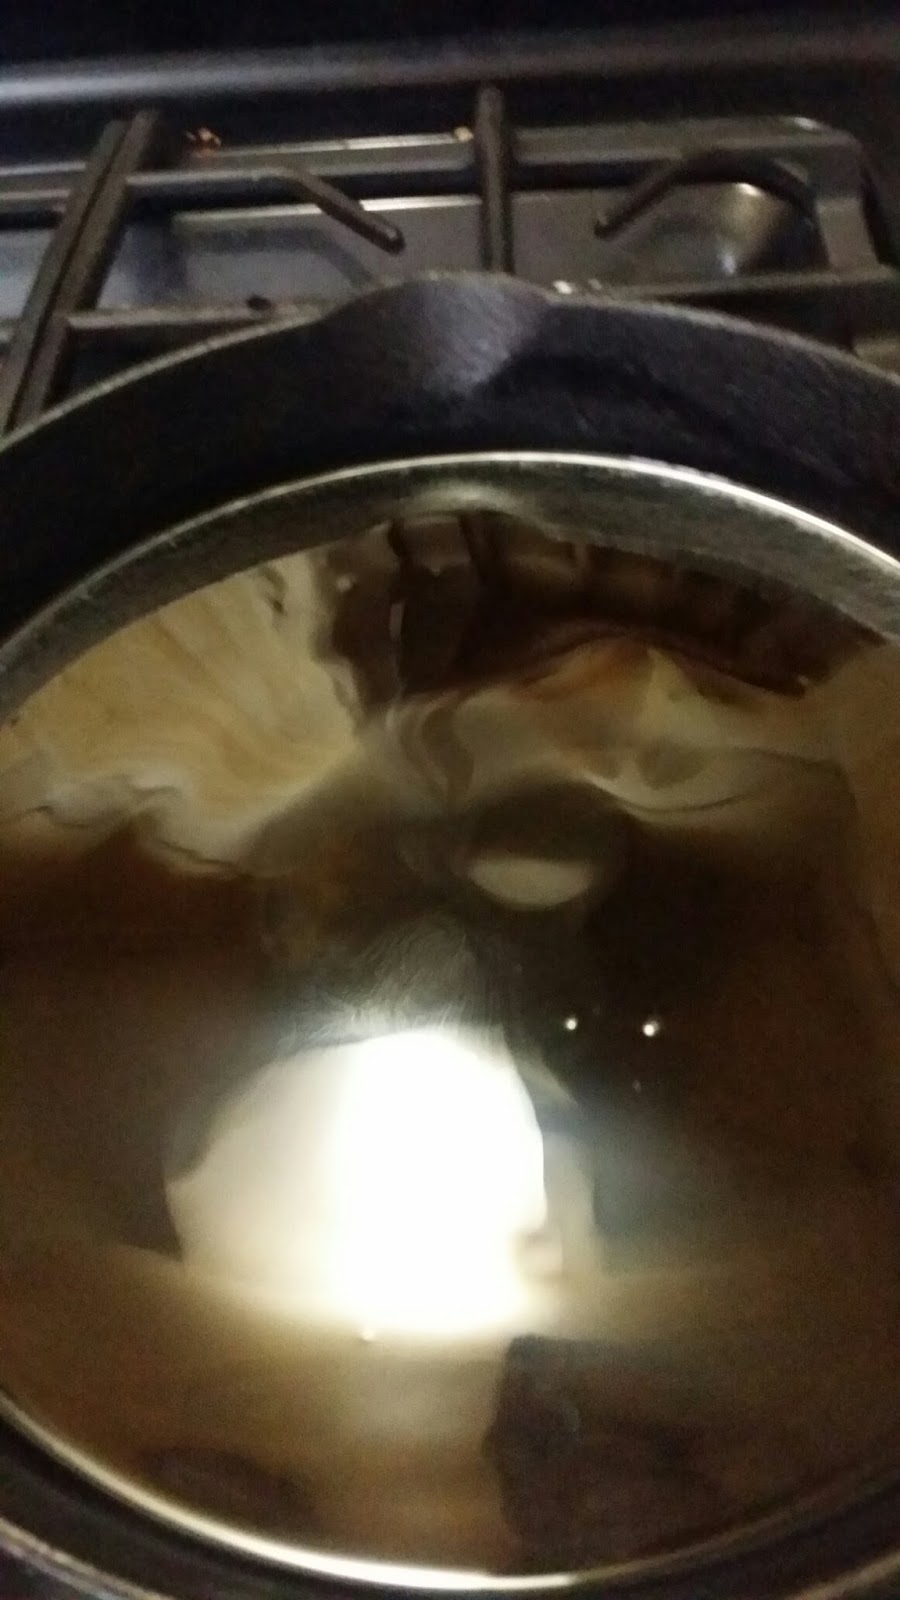
You can use a deep fryer and I do if I have mine out but a skillet will do the same job.  As always, I highly endorse cast iron, but any skillet will do.  Place about 1/2"-3/4" oil in the pan.  Be careful doing this, if you have a shallower skillet, go with the smaller amount of oil.

Before you start frying, get a plate or I use a pie pan, with a paper towel in it to drain them on.  You can use a sheet pan with a cooling rack on it to drain the oil if you like.  I do both, depending on the mood.

Start heating the oil in the skillet, get your tongs, spider, slotted spoon, whatever you want to use to pull them out of the oil when they're done.  Get all this together before you start frying as it will move quickly once you start.


Once the oil is hot, I cook just one just like when you make pancakes and make that one little one first.  This is just to make sure the oil is hot enough but not too hot.


Once this is done and your oil is good to go, carefully put the biscuits in the oil.  Be careful to not overload the pan.  They'll cook quick enough without having to put too much in the skillet.


They will cook quickly


.
While they cook, put the apple butter in dishes that let you dip in them.  You can heat the apple butter a bit in the microwave.


Let the first batch drain while you cook the second.


Then just plate and serve.


The amount of pictures make this seem time consuming, but it really isn't.  I made these for breakfast in about 10-15 minutes. 

They are sooooo yummy!

Friday, November 20, 2015

Prepping for AFTER-Thanksgiving!

No, I don't mean Black Friday!  LOL  I mean the leftovers!  

We take such care in planning every dish that hits the Thanksgiving table...so much food!  And yet, few think of the leftovers.  Let those leftovers become planned overs!  It just takes a little planning.

Let's just talk about the turkey itself for the moment.  Everyone loves that turkey sandwich on a dinner roll for lunch the next day, no doubt about it!  There's much more that you can do though.  First, obviously, slice as much of the turkey off of the carcass as you can.  After you slice up you can, it's time to pick the rest of the meat off.  You know those little bits that you can't really cut but get as much as you can.

Then I take the carcass and put it in a large stockpot.  If you don't have a big stockpot, break the carcass down to smaller pieces and use part of it in whatever pot you have that it fits in.  I put an onion and some carrots and celery and some peppercorns in the water.  I'll bring this to a boil and then reduce the heat to a slow simmer.  And I let it simmer for a good while, until the liquid reduces.  Once the stock has reduced and it tastes wonderful, turn off the burner and let it cool.

While you're waiting on the stock to cook, portion out the turkey into good Ziploc freezer bags.  Think of the meals that your family likes to eat and portion the meat to fit that meal.  Around here, turkey Manhattans are a must!  So, portion out what you need for each meal until you run out of the sliced turkey.  When you seal up the Ziplocs, try to get as much air out of the bags as you can.  Be sure to label the Ziploc with what it is, what meal it's portioned for and the date. 

With the shredded, or picked over, turkey, again, portion it out into Ziploc bags.  You can use this for turkey soup, turkey & dumplings, turkey salad, etc.  We interchange turkey with chicken but I know a lot of people who don't like to substitute it but use your imagination.  Then portion, label and date the bags of shredded turkey.

Once the stock is cooled, strain it well.  I put it in gallon Ziploc bags as well.  Again, label and date it.  If you have a bit left (or plan on it) I put a small amount, maybe 2-3 cups in a bag separately to use to make Turkey gravy for the Manhattans.  It makes it extra yummy!  I don't think I need to tell you to be sure it is sealed well!  You can use freezer safe containers if you'd like, I just prefer Ziplocs.  As I always say, if you're going to use freezer bags, get good quality ones.  I prefer Ziplocs, they cost a bit more than store brands (use a coupon to offset that!) but it's protecting your food in the freezer, so get good ones.

I always pack the bags in such a way that they lay flat in the freezer.  You'll get more in the freezer if they will lay flat on top of each other. Be sure things are cool before you put them in the freezer or they will stick together in terrible ways!

So, even if you think your family ate all the turkey, you can still get a meal or two or three from what's left on the carcass.

If you have extra rolls, you can freeze those too and reheat later.  If your family is anything like mine, it doesn't matter how many rolls you make, there will be none left over...my brothers usually make sure of that.

Extra gravy can be frozen, I don't necessarily like the gravy thawed (that's why I put some stock up to make fresh gravy) but you can add the gravy you froze to stock for extra flavor.

Extra mashed potatoes can be used for potato pancakes or as a thickener for cream based soups.

Extra veggies that aren't creamed or sauced, can be put up in the freezer to add to vegetable soup later.  In fact, I will keep a Mason jar in the freezer and add that extra corn or green beans or whatever that is left after meals and when the jar is full, it's the perfect amount for a pot of veggie soup.  Side note...I'll also chop or shred and freeze left over beef or steak for veggies soup too.

So, use your imagination.  Plan now.  When you think of what dishes will be on your Thanksgiving table, think also of what you can do with any that you have left.  Make sure you have some Ziplocs on hand to put things up.  

In my mind, this is more than just saving money.  The amount of food that is wasted in this country on holidays is shameful.  I'm not by any means saying that one should not have a feast to celebrate our holidays with our loved ones, but try to plan so that you aren't wasting food.

On that same train of thought, please, PLEASE consider donating something, anything, to those who are helping the less fortunate.  There are families that wouldn't have a holiday meal without the help of a food bank, shelter, church, etc.  If you are unable to donate cash, even a can or two of veggies, a jar of gravy, or other canned goods will help.  Every little bit helps.  

If you are not able to donate cash or items, consider donating your time.  Even an hour can help to sort and organize the items in the food pantry to make things easier for distribution.  My son was 5 the first time he did this, they'll appreciate your help, trust me.  We're all in this world together, we need to remember this and to help out those who aren't as fortunate as we are.

Sunday, July 5, 2015

Farmer's Markets and Blackberry Scones!

Even back when I had a huge garden, I still loved going to Farmer's Markets.  You can always find something new to try whether that is something you don't grow yourself or some yummy goodness that a vendor made.  A nice bonus is that you're never 100% sure what you'll find until you get there!  

Since my health won't let me have a big garden anymore (Asthma truly sucks), I've grown to love the Farmer's Markets even more.  I pay a little more than it cost for me to grow my own, but in the big picture, it's worth it as I still get fresh, local produce.

This past weekend, the hubby and I visited a market on Saturday morning before we had to pick up the Short Dude from summer camp.  The particular market had a coffee vendor, so my morning was even better!  Hubby found a vendor who had blackberry scones.  He bought a couple and liked them so much that he went and bought the remaining 3 they had left.  

So I searched and found a recipe for them.  I'd never made scones before and surprisingly, they were much easier to make than I'd realized.  They're really nothing more than fancy biscuits!  I used this recipe, and I think it turned out pretty good.  

Here's what's involved:


Oh, I forgot this in the pic....


I had the blackberries in the freezer (forgot to get a pic of them before) but the recipe called for putting some flour on the frozen berries, mixing them and putting them back in the freezer until later.  Thawed berries will not only get mushy but turn the whole recipe purple.


It starts easy enough with the dry ingredients and cutting in the butter.  Now, my Gram was amazing in the kitchen and could use her hands to cut the butter in, I'm not that good.  I also never got the hang of using a pastry cutter.  It should be easy but I just can't...LOL.  I use two knives to do it.  It's easy and I don't need extra gadgets in my kitchen.


This next step is what makes the dough so rich and yummy!  You mix the half and half with vanilla.  I use Vanilla-Bean paste for anything that calls for vanilla now, it's so yummy.  I get it on Amazon, click here to find it!  I buy it in large bottles for my jam business but you can get it in smaller quantities.  


Gently mix the half & half/vanilla mixture into the flour.  Don't over mix it!  It will look like this, it doesn't look mixed well but trust me here.


At this point, use your hands to gently mix in the frozen, floured berries.  Flour your hands, it won't prevent any of the mix from sticking but it will help.


Once the berries are mixed in, somewhat, again, don't over mix it!  Turn it out onto a floured surface.  Don't knead it, just kinda pat it into a square.


Cut the square into fourths.  Then, cut each fourth in half diagonally.  


I put them on a sheet pan lined with parchment paper.  You don't have to use parchment, but I didn't want to have to scrub the berries that will inevitably ooze out of the scones and bake onto the sheet.  


Then you take the last tablespoon of butter and cut it into 8 pieces and put each little piece on top of the scones.


Bake them for about 15-17 minutes at 425 degrees.  They come out looking like this


I set the cooling rack over a sheet of wax paper 


The glaze is so simple.  It was just a cup of powdered sugar and the juice of a lemon whisked together.


I just used a spoon to drizzle the glaze over the still-hot scones.  You could use less if you like or even make more and for a heavier glaze but I think this was just the right amount.  This is where the wax paper under the cooling rack comes in handy to avoid a messy clean up!  


Once they cooled, this is how they looked


The next time I make them, I'll probably cut the triangles in half again as I'd like them to be a bit smaller.  They were flaky like biscuits and the lemon in the glaze plays off the blackberries well.  In the background is that hint of vanilla.  All together, they are delicious!  Hubby and the Short Dude gave it two thumbs up and asked what other fruits I could make them with.  I'm thinking it would work with any berry, and the glaze can be made with lemon or even just milk (or more half & half).  My son wants me to make them with chocolate chips...LOL

Enjoy!

Tuesday, February 17, 2015

Changing routines!

So much has been going on around here!  Overwhelming doesn't begin to describe it.  The short version is that I have been in school to become an English Professor at the college level and am in my last semester of my Bachelor's degree.  I have decided (with my family's support) that I will continue on to pursue my Master's Degree. I was offered a job at Ivy Tech Community College.  Although it is currently part time tutoring in the TRIO program, it is still 20 hours a week.  I am also going to school during this semester so, in essence, I will still be gone from home almost as much as if I were working full-time.  

But the frugal part of me sees this as an opportunity to have the part time job pay for my Graduate classes.  It will take me a bit longer to get through my Master's courses but, cross your fingers, I won't end up with a mountain of debt when I am done.

This brings me to figuring out how to make this all work.  Although I have worked, it's been a very long time since I had full time out of the home hours.  I will work during the day and go to school a couple of evenings a week.  Plus my husband teaches late one night a week an on Saturdays.  Add to that, we are responsible for transportation for our son to and from school and all of his activities.  This should be interesting.  I know when I was a single Mom, working full time I had a system that worked well for us.  It's been over a decade since then so I'm working on tweaking that to make it a habit again.  Lord knows, without it, we'd eat out half the time and I'd have to devote every weekend moment playing catch up.  The first part of that is too expensive and the latter part I'm just too old for.  LOL.

To make things a little easier, I already do menu planning each week so that's not an issue.  The difference now will be taking some time on Sunday to do any prep work that I can do to save time through the week.  Since I do have two nights a week that I have classes, I have to factor in that those nights need treated differently as one of them is busy for my husband and son too.

Prep work would include browning any meat for the week's menus, chopping any veggies and portioning them out.  Casseroles can be made and put in the freezer, just make sure and take them out the night before.  Roasts can be browned for the crock pot and put in the fridge until needed.  If you cut potatoes, be sure to put them in a Ziploc full of water so they don't discolor.  You can brown hamburger for chili, tacos, sloppy joes, etc.  

The crock pot will be our friend on nights that I have class.  One of those nights, the hubby gets off at 5 downtown and our son has Scouts on the far south side at 7.  He's gotta get home, feed the short dude and get to Scouts.  The first week wasn't exactly a successful experiment with me starting the meal before I left and them finishing it.  So to the crock pot we go!  Many crock pot meals can be put together in a Ziploc baggie and frozen until ready to use.  Again, set the bag out the night before to thaw, then just pour into the crock pot and go.  

I also make a salad bowl (see a previous post) that lasts for several days and they'll eat it if it is ready.  I also cut up carrot sticks, celery sticks and put them into a Tupperware type bowl in the fridge with cherry tomatoes and whatever else you like on a veggie tray.  I keep a bowl or Ranch dip in there too, if it's easy, they'll eat it instead of something less healthy.  

I don't always make them eat only healthy, on Sunday, I'll also make the snack of the week.  Whether that is a batch of cookies, a pan of brownies or whatever.  This week I took some bananas that were turning and made banana bread and a couple of dozen banana nut muffins.  I toss them in a Ziploc and freeze them so they're easy to grab and toss in lunchboxes or to warm up for a snack.

There are more things but I'm still trying to remember what I did way back then and how to make it work now.  I'll add more to that later, as I remember.

I do know that the family calendar is a lifesaver!  I received this one for Christmas and I am loving it so far!


There is a line for each one of us plus a spot for notes.  It helps to keep things straight.  I'm playing with a calendar on my phone that supposedly you can share among family members, but I don't know how to share it yet.  My son ended up with it on his phone (I have no clue how) and he thought it was just on his phone so he started deleting things.  This, of course, deleted them on my phone too.  That was a nightmare so for now, we're sticking to old school and this calendar!  LOL

The other thing that really is helping a bunch is our message center that we created on the fridge.


Our thoughts are the top dry erase board is for "To-Do" list type of things.  Load the dishwasher, pack a lunch, etc.  The bottom one is reminders.  The Calendar says that Scouts are on Wednesday but there is a reminder note here for the hubby that Scouts are at 7 and where the meeting or drop off is (it's not always in the same place).  It has my son's nightly reminders as well.  

There is also a magnetic notepad for items needed from the Grocery.  There is also a magnetic clip for anything else that we need to make sure the other one sees.

I know it's hard to read in detail but the list under the pen cup is our weekly checklist for each room. This list is here because the men in my life are the "can't see the forest for the trees" kind of men.  So if they have a few minutes time to help me, they can see what's on this list and pick one.  Ideally, by the weekend, the list will have all items checked off.  Here is that list:
WEEKLY CHECKLIST
Kitchen:
1.    Sweep floor
2.    Mop floor
3.    Clean out fridge
4.    Clean counter
5.    Clean stove & hood

Bathrooms:
1.    Clean mirrors
2.    Clean counter
3.    Sweep floor
4.    Mop floor
5.    Empty trash

Bedrooms:
1.    Vacuum carpet
2.    Dust
3.    Change sheets
4.    Clean TV screens

Living Room:
1.    Dust
2.    Vacuum
3.    Bag newspapers for recycling
4.    Straighten book bag area
5.    Return ‘strays’ where they belong

Dining Room:
1.    Clear Table
2.    Vacuum
3.    Straighten Jam area

Paperwork & Miscellaneous:
1.    Plan menus for next week
3.    Water plants
4.    Clean out vehicles & check fluids
5.    Check freezer stock
6.    Check pet food supplies

    This isn't a perfect list, but it's a start.  I am thankful that my guys are willing to pitch in and help out.  They know that we're a team and the goal at the end of this adventure will benefit all of us.  I know that I have to accept that they won't do things the way I would do them but they will be done.  And, theoretically, we should still have some time for us that doesn't involve catching up for the week.  I'll keep you posted on how it's working out!  LOL

Saturday, January 24, 2015

Super Bowl Food!

Next week is the Super Bowl and we can't wait.  I will say it's sad that there is so much controversy going on this year with "DeflateGate" and all.  My own personal opinion is they should be harshly punished for any cheating regardless of what team, Super Bowl or not.  It's as if these grown adults are currently only seeing money and fame and are forgetting that there are a lot of children who love the game and look up to these people.  And they example they set?  Cheating.  Now before I get blasted I know it was only one team in the media doing this right now but people aren't going to remember what happened in the first round of the playoffs, they're going to remember this cheating scandal.  And that's sad.  So come on people...remember the kids are watching!

We never go to Super Bowl parties because we have kids at home who have school the next day. My kids are not the type of kids that can stay up late and have a good day the following day so we've just always stayed home for the big game.  You can still have a Super Bowl Party at home!

Now back to the best part of the Super Bowl (if you're not going to the game that is)...the food!  I love watching football, so I don't want to be stuck in the kitchen cooking during the game.  There are a lot of fun foods that go beyond chips and dips that you can prepare ahead of time and are so yummy.

Our menu this year (and I will try to remember to take pics next week as I am preparing it) will include hot wings, taco dip, sloppy joe cups, lettuce wraps, cookies, hand pies, and I'm sure there will be add-ons as my guys think of more.

I know that sounds like a lot for our family of three but here's the secret.  Part of that is made with planned-overs.  When we had Tacos, I put the leftovers in a Ziploc and tossed it in the freezer, same with homemade sloppy joes.  The lettuce wraps are also starting with leftover baked chicken.  Even the hand pies are starting with pie dough I had left over after a Christmas order I had for the pies and I tossed it in the freezer.

Here's how it all comes together.  I bought frozen, uncooked chicken drummettes when they were on sale.  I know the drummettes cost a bit more, that's why I wait on a sale but for the amount of meat, I think it's more cost effective to get the drummettes.  I have a deep fryer but you can certainly do this in a dutch oven of oil, just be really careful.   I don't even thaw them.  I have the deep fryer set at 350 degrees and I fry the frozen drummettes for 12 minutes.  Don't over fill the pan and they'll cook better.  When they are done, I immediately coat them in the sauce.  I can't eat overly spicy stuff so, I mix Frank's hot bbq sauce with our favorite bbq sauce (for us, that is Sweet Baby Ray's) I mix it to taste.  I put it in a big bowl and using tongs mix the fried wings around it in.  I am not talented enough to toss them in the bowl...LOL.  I then put them on a cooling rack that is set on a sheet pan and put them in a warm oven to hold while I cook the rest.

The taco dip is so easy.  Basically, you take everything you like on a taco and layer it in a cake pan, sheet pan, whatever.  I start with refried beans (I mix them with a little taco sauce to thin them a bit) on the bottom, then taco meat mixed with black beans, cheese, sauce (if you didn't use some in the refried beans), tomatoes, shredded lettuce, avocado, sour cream, etc.  You can add jalapenos if you like.  Just use tortilla chips with this.  Easy.  I should add that you can serve this with the refried beans and taco meat hot or cold.

The sloppy joe cups are so easy.  I take cheap, biscuits in a can and put one biscuit in a muffin cup that's sprayed with non stick spray.  Kinda push them in so that they fill the tin and make a cup, add in a spoon or so of the sloppy joe mix.  Bake until the biscuit is done.  When they come out of the oven, you can add cheese on top.  Done.  It's nice that you can make these ahead of time and warm them just before the game.  

The lettuce wraps are leftover baked chicken and a packet from the grocery to make lettuce wraps.  Again, these can be made a head of time and warmed.  Just put the bowl of hot chicken mix out with some fresh cold leaf lettuce.  

The hand pies are something I began making because my husband and nephew are from the south and they love them.  It took a while to get the dough just right because I like a thin pie crust and that doesn't translate to hand pies well.  But, now I have it thanks to those guides you can buy for your rolling pin to prevent me from rolling it too thin.  Anyway, I have this neat little hand pie cutter thing that I got from Walmart, it's by Wilton.  it not only cuts out the top and bottom but then you can fill it and it crimps the edges too.  


So, for the filling you can use pie filling from a can or make your own.  Devon loves chocolate or butterscotch pie so you can even use pudding.  Just make sure the pudding is cook pudding and not instant or you'll have a liquidy mess.  I will use apple pie filling for most of them and make a few butterscotch ones for Devon.  I'll be using my Gram's recipe for the butterscotch filling and since it only takes a little bit, I'll put the rest in a graham cracker crust that I have in the freezer (also bought on clearance, I think you can freeze almost anything) and we'll have a pie for later in the week.  I do bake these instead of frying them.  Since the filling is done and they're eaten cool, just bake until the pie dough is done.  Once done, I put them on a cooling rack.  When cook, I sprinkle with powder sugar.  You could easily glaze them with a powder sugar/milk mix but it's all about easy for these!  LOL

Finally, the cookies will be whatever my son decides that he wants for the week.  We bake a treat on Sunday that is for the week.  So, I'll just set some of these out for the game too.

Drinks can be anything from water to soda to juice.  We don't drink very often at all here.  I'll have to see if hubby wants a beer for that night.

So you see, you can have a Super Bowl party at home and eat well even if you can't really go out because kids have school the next day.  So think and prepare now so that you know what you want for the big game and you won't be stuck in the kitchen the whole time!  

Friday, November 28, 2014

Happy Thanksgiving All!

Hello everyone!  I hope everyone had a wonderful Thanksgiving.  If you're out braving the Black Friday crowds shopping, please be careful.

I know lots of people are sitting there with tons of Thanksgiving leftovers.  You can only eat so many turkey sandwiches, right?  Get creative and put your freezer to use!  I didn't host this year so I will be cooking turkey for us on Sunday.  

The first thing I do is cut as much meat off the carcass as I can.  Then I put the entire carcass (you might have to break it down if you have a smaller pot) and put it in a stock pot big enough to cover it with water.  If you truly have a small pot, nothing says you have to use all of the carcass.  I will add some of the same things into the stock that I used in cooking it, carrots, onions, leeks, parsnips, celery, etc.  You could even use some of the veggies from the veggie tray in your stock.  Be flexible and be creative.  Bring it to a boil and then reduce to simmer.  Skim off the gunky gray stuff.  Then let it simmer and do its thing for a while.  I like to simmer it for 2-3 hours, the more it simmers the more the flavors concentrate.  When it is done, I let it cool and then strain it.  From here you can cool completely in the fridge and then remove any fat off the top, it should be in a solid form then.  From here you can use it or portion it out and freeze it in Ziploc bags for later use.

A friend of mine showed us a picture of her freezer.  She'd taken some of her leftover turkey and make turkey pot pies, don't bake them and put them in the freezer.  When you're ready to use them, treat them just like you would those from the grocery.  Only they'll taste so much better.  On a previous post (Here) is a recipe that I use to make Chicken pot pies, you can simply substitute turkey in this recipe.

Turkey and dumplings is just as good as Chicken and dumplings.  There is a recipe for it on the same link above.

My husband looks forward to turkey Manhattans after every Thanksgiving.  This will use up leftover mashed potatoes, leftover turkey and the gravy too!

You could also turn leftover mashed potatoes into potato pancakes.  I'm sorry for no recipe here but I just kinda wing these.  If I have 2-3 cups left, I'll add an egg, some flour, some chives, some shredded cheese (not too much) and some bacon bits (fresh or packaged, it really doesn't matter).  My family loves loaded baked potatoes or kicked up mashed potatoes so they like kicked up potato pancakes too.  The dough needs to be stiff enough to roll into balls, about like peanut butter cookie balls before you squish them with a fork.  I flatten them and fry in a bit of butter, sometimes with a little bacon grease added for flavor.  Fry until brown and yummy.

Stuffing is a tough one.  But I've used it as a topping in the past when I've made the insides of the turkey pot pie and had more than I needed for the pie crusts I had.  Just put the extra pot pie filling in a casserole dish and crumble the stuffing on top and bake.  The stuffing gets all crispy and crunchy. 

At this point, if you have any turkey left, put sandwich sized amounts on wax paper and then put them on a sheet pan or cookie sheet and put in the freezer.  Once frozen, pop them into a Ziploc and you can grab what you need for sandwiches later.

Just some ideas for dealing with the Thanksgiving leftovers.  It should make some of the cooking during the days when you're shopping, wrapping or decorating and need a little help in the kitchen!

Be safe out there!