Wednesday, December 24, 2014

Happy Holidays!

Hello everyone!  I hope you're all enjoying this time of year!  I've finished another semester and said a little prayer for my Political Science grade...LOL  It's also been a lot of hustle and bustle trying to get ready for the Holidays.  My husband taught his first full semester as a college professor so he was gone a lot dealing with the learning curve of settling in to a totally new type of job.  I've been visiting a lot of Christmas Craft Fairs with the jam business, which I must say has been so much fun.  

We laughed around here because it took us 9 days to get the tree up.  Yes, NINE days.  Just for the tree.  With everyone so busy, we did a little at a time.  A very little.  But it got done and it looks pretty good too!  It took another 2 days on one weekend to get the outside stuff up.  That was exciting to see since I got the lights last year on after-Christmas clearance for next to nothing.  I got lucky and even the picked over Christmas section at the stores yielded enough of the same type of lights that I was able to do the front of the house for under $25.  I'm going to have to really hunt this year's after-Christmas sales as my husband wants to turn our flagpole into a Christmas tree in the way the city of Indianapolis turns the Soldiers and Sailors Monument into a Christmas tree.  That's a LOT of lights.  

Back to the Christmas Craft Fairs.  I would really suggest that you check out some of these in your area.  There are some really wonderful things out there that people make that are unique gifts.  I didn't think to get a picture of it before I wrapped it, but I got my nephew a VERY cool bow and arrow toy (I wish I had gotten his information to share) that is safe for kids to use with nice padded tips on the arrows, is simply  made with some PVC pipe and kite string (it's nice that if the string breaks, it's just kite string and can be replaced), it doesn't shoot far, which is good for little kids and it is going to give me some serious "Great Aunt Points"!  LOL.  I have gotten some amazing goat's milk soaps and lotions from Solstice Sun Farms, I'm diabetic and have seriously dry skin and I'm amazed at how well they work.  I got my son a lotion that smells like Juicy Fruit chewing gum!  I found my grandkids some crocheted blankets in their favorite colors made by Favors by Design.  My granddaughter got some hair bows from MiaBownita.  She'll be so excited.  I was at a Christmas Craft Fair sponsored by the Special Olympics and there was a beautiful young lady with Down's Syndrome who made some beautiful bracelets that she was selling to raise money.  My grandkids got some of those too.  

I could go on and on, but you get the idea.  The point is that this is a wonderful way to support small local business people and crafts people.  You can get some really unique gifts that go beyond just buying the newest thing out there or the same old gift set.  Take the time, generally on a weekend, and go find a local show near you and just check it out.  You'd really be amazed at what you'll find.  
Tomorrow, I will have my grandkids here and have a little fun planned for them.  I'll get pictures and share in a day or so.  In the meantime, have a wonderful holiday!

EDITED TO ADD:

I thought I'd edit this to add some local craftspeople I know (other than those linked above) to a list with links to how to find them.

Jennifer Wainscott makes diaper babies


Friday, November 28, 2014

Happy Thanksgiving All!

Hello everyone!  I hope everyone had a wonderful Thanksgiving.  If you're out braving the Black Friday crowds shopping, please be careful.

I know lots of people are sitting there with tons of Thanksgiving leftovers.  You can only eat so many turkey sandwiches, right?  Get creative and put your freezer to use!  I didn't host this year so I will be cooking turkey for us on Sunday.  

The first thing I do is cut as much meat off the carcass as I can.  Then I put the entire carcass (you might have to break it down if you have a smaller pot) and put it in a stock pot big enough to cover it with water.  If you truly have a small pot, nothing says you have to use all of the carcass.  I will add some of the same things into the stock that I used in cooking it, carrots, onions, leeks, parsnips, celery, etc.  You could even use some of the veggies from the veggie tray in your stock.  Be flexible and be creative.  Bring it to a boil and then reduce to simmer.  Skim off the gunky gray stuff.  Then let it simmer and do its thing for a while.  I like to simmer it for 2-3 hours, the more it simmers the more the flavors concentrate.  When it is done, I let it cool and then strain it.  From here you can cool completely in the fridge and then remove any fat off the top, it should be in a solid form then.  From here you can use it or portion it out and freeze it in Ziploc bags for later use.

A friend of mine showed us a picture of her freezer.  She'd taken some of her leftover turkey and make turkey pot pies, don't bake them and put them in the freezer.  When you're ready to use them, treat them just like you would those from the grocery.  Only they'll taste so much better.  On a previous post (Here) is a recipe that I use to make Chicken pot pies, you can simply substitute turkey in this recipe.

Turkey and dumplings is just as good as Chicken and dumplings.  There is a recipe for it on the same link above.

My husband looks forward to turkey Manhattans after every Thanksgiving.  This will use up leftover mashed potatoes, leftover turkey and the gravy too!

You could also turn leftover mashed potatoes into potato pancakes.  I'm sorry for no recipe here but I just kinda wing these.  If I have 2-3 cups left, I'll add an egg, some flour, some chives, some shredded cheese (not too much) and some bacon bits (fresh or packaged, it really doesn't matter).  My family loves loaded baked potatoes or kicked up mashed potatoes so they like kicked up potato pancakes too.  The dough needs to be stiff enough to roll into balls, about like peanut butter cookie balls before you squish them with a fork.  I flatten them and fry in a bit of butter, sometimes with a little bacon grease added for flavor.  Fry until brown and yummy.

Stuffing is a tough one.  But I've used it as a topping in the past when I've made the insides of the turkey pot pie and had more than I needed for the pie crusts I had.  Just put the extra pot pie filling in a casserole dish and crumble the stuffing on top and bake.  The stuffing gets all crispy and crunchy. 

At this point, if you have any turkey left, put sandwich sized amounts on wax paper and then put them on a sheet pan or cookie sheet and put in the freezer.  Once frozen, pop them into a Ziploc and you can grab what you need for sandwiches later.

Just some ideas for dealing with the Thanksgiving leftovers.  It should make some of the cooking during the days when you're shopping, wrapping or decorating and need a little help in the kitchen!

Be safe out there!

Thursday, November 20, 2014

Oops

Just popping in for a quick hint.  Have you ever been following a recipe and found out afterwards that you forgot an ingredient?  Yea, me either.  

But, just in case, I now get out all of my ingredients for my recipe and as I add each one to the bowl, I put that ingredient away.  I think of the extra steps in putting things away as exercise.  I end up making laps around my kitchen and dining room (where my pantry is actually located) so I'm counting that as steps on my pedometer.

Happy baking for the holidays!

Sunday, November 16, 2014

Take some help!

Good morning everyone!  I'm sorry I've not kept up with this lately, life has been hectic.  My jam business was invited to attend the Indy Cooking Expo, it was a wonderful time.  I loved that my husband would watch the booth so my son and I could sneak over to the presentation stage and watch the demonstrations.

I will admit that I was surprised to see a professional chef who was taking some help from the store.  I had this grandiose idea that a professional chef made everything homemade, wouldn't hear of shortcuts.  Yea, I realize now how ridiculous that sounds.  They're just like us.  Sometimes you need a little help.

One Executive Chef from a catering company suggested buying cornbread for the stuffing on Thanksgiving.  She said, and it makes sense, that the item will be transformed in the end so there was no reason not to make things a little easier on yourself on the holiday.  

Another, Chef Suzanne demonstrated a yummy pumpkin-black bean soup.  She said you could go to all the fuss of using fresh pumpkin but there was absolutely nothing wrong with using canned.  As long as it isn't pumpkin pie filling that is...LOL  This soup was fabulous.  I was so shocked when my husband tasted it (he generally does not like pumpkin) and loved it and asked me to make it for him.  The recipe is here.  

Speaking of my husband, when he makes chili, he's famous for taking a bit of help from the store.  After he browns the meat (sometimes it's beef, sometimes it's turkey or even ground chicken) he will add a full jar of Pace Picante sauce.  He makes sense here, it has spices and peppers and onions that are diced to the right consistency.  I hadn't thought of that before I met him but it works.

If you want to make a quick chicken pot pie, it can be done with leftover chicken, a small can of peas & carrots (or other mixed veggies), a small can of diced potatoes and even store bought pie dough.  It's fairly simple to put together with some thickened gravy.  I would always make the gravy homemade as it will thin out as it cooks.  I guess you could use a "cream of" soup without diluting it as well.

Something that a friend does that I found ingenious and we tried it and my family loved it.  She takes one cup of Apple Butter (I love that she uses mine!  LOL) and mixes it with 1/4 cup of Apple Cider Vinegar and pours it over top of a pork roast in the crock pot and lets it cook all day.  All the spices and apples already prepped for you in the Apple Butter gave it a wonderful flavor and it was not dry.  Seriously yummy.

So, don't be afraid to take some shortcut help when you're in a rush.  It beats popping by some drive thru somewhere in both taste and nutrition!  Ok, gotta run, I have a large English paper to write!  

Thursday, October 9, 2014

Fall, what a wonderful season!

Fall, the air is crisp and cooler.  MUCH cooler that it has been.  I am by no means looking forward to Winter coming but I am sure glad the awful heat of Summer is over.  This October will be bittersweet for me.  My youngest of the girls will turn 18 this month.  On one hand, she will be entering adulthood, spreading her wings and, soon enough, heading off to college.  On the other hand, my little girl will be all grown up.  Make note though, five or thirty-five, she will always be my baby girl!  Shhhh, don't tell her I said that, she's "almost an adult"...almost...LOL

I love the foods of fall.  Soups, stews, roasts.  I pretty much  love them all.  I've decided this is because they are less fussy foods.  There isn't a hard and fast rule about these types of foods in my book.  I start with some stock, it might be freshly made or it might be from the freezer, shoot, you can even use the ready made in a box (it won't be as good as your own, but it will do) and add this and that.  Add some cooked beef (or not, it can be just veggies), I add what veggies I have.  That might be potatoes, carrots, corn, green beans, tomatoes (yes, I know that technically they are fruit), leeks, onions, whatever I have on hand can end up in the veggie soup pot.  Sometimes I add barley and sometimes it's alphabet noodles, sometimes both.  The point is that you can make vegetable beef soup anyway you want too.

Chicken soup is similar around here.  About the only standards with Chicken soup here is Chicken and broth.  You can use noodles or rice.  Add carrots and celery, leeks or onions.  We have one we like that we call "Grown up Chicken Soup".  It got that name from one of our picky daughters that may or may not have been mentioned in this blog.  She said it wasn't like Campbell's so it must be "grown up".  I'm sharing this 'recipe' but remember that my measurements are approximate and 'to taste' so if you like more of something, add it.

Grown Up Chicken Soup

6-8 Cups of Chicken broth
2 cups cooked, shredded chicken (I usually use leftovers)
A couple of handfuls of wide egg noodles (homemade or store bought)
1 cup of frozen corn
2-3 hard boiled eggs, coarsely chopped
1 Tbls fresh chopped parsley (1 teaspoon of dried)
Salt and Pepper to taste

Bring the broth to a boil.  Add the noodles and cook for about 6-7 minutes.  Then add the the rest of the ingredients and cook until everything is warmed through.  

One little hint that I thought of as I typed this out.  When using herbs, if a recipe calls for fresh and you only have dried, it's a 3-to-1 ratio.  Three teaspoons of fresh herbs equals one teaspoon of dried.  Don't get those backwards, it will overpower your dish.  Don't ask me how I know, just trust me here...LOL

Saturday, August 30, 2014

Blueberry Bread

Posts have been somewhat sporadic the last month or so mostly due to the Indiana State Fair and the Beech Grove Farmer's Market that I've been involved with all summer.  I'd always loved going to markets, I had no idea we'd have so much fun being vendors at the market. The market, in and of itself, has become a little community.  We all know if my son isn't in my booth, he's in Dan's playing with his son John.  We all know that Steve, "The Popcorn Guy", will let the vendor's kids help him out in his booth.  I know that when my husband disappears that you'll find him helping Elmer, the old farmer with the produce in the back.  They often talk about crops and hints for better ones.  We notice and question when someone isn't at the market that week.  We also love to see all the customers, new and returning ones, coming to get the week's goodies whether that is produce, jam, baked goods or even just to socialize with everyone.  It's so much fun!

Along with jams, I make some breads as well.  One of those, the Alabama Blueberry Bread, is quite popular.  I had entered it in the State Fair and got some really nice comments about it being so moist with a unique flavor because of the use of cloves in it.  I told a friend I'd share the recipe here and then forgot (Sorry Chari!) so here it is!

I stumbled on this recipe somewhere online in a search for something different than just blueberry muffins.  I'll make muffins or breakfast breads and freeze them individually for my hubby and the kids to grab for breakfast or a snack.  This recipe uses the "muffin" method in making it to keep the finished tender, so don't overwork it.  I'll share the recipe at the end that is for one batch that makes two regular sized loaves but the pictures I'll share are for a triple batch that I make when I am making mini-loaves for the market.  

Here we go:


Here's what you'll need.  My smart-aleck husband pointed out that my Clorox wipes are not listed in the recipe...I didn't notice that they were in the frame when I sat all these ingredients next to the sink.

Before anything else, mix some of the cinnamon and sugar (see recipe) together and set aside, you'll need this later.


Here is a hint that I use when baking in larger quantities, as I put the (in this case) flour in the bowl, I put each cup in little piles around the bowl.  If I lose count, I can count the piles.  It happens.  Often.

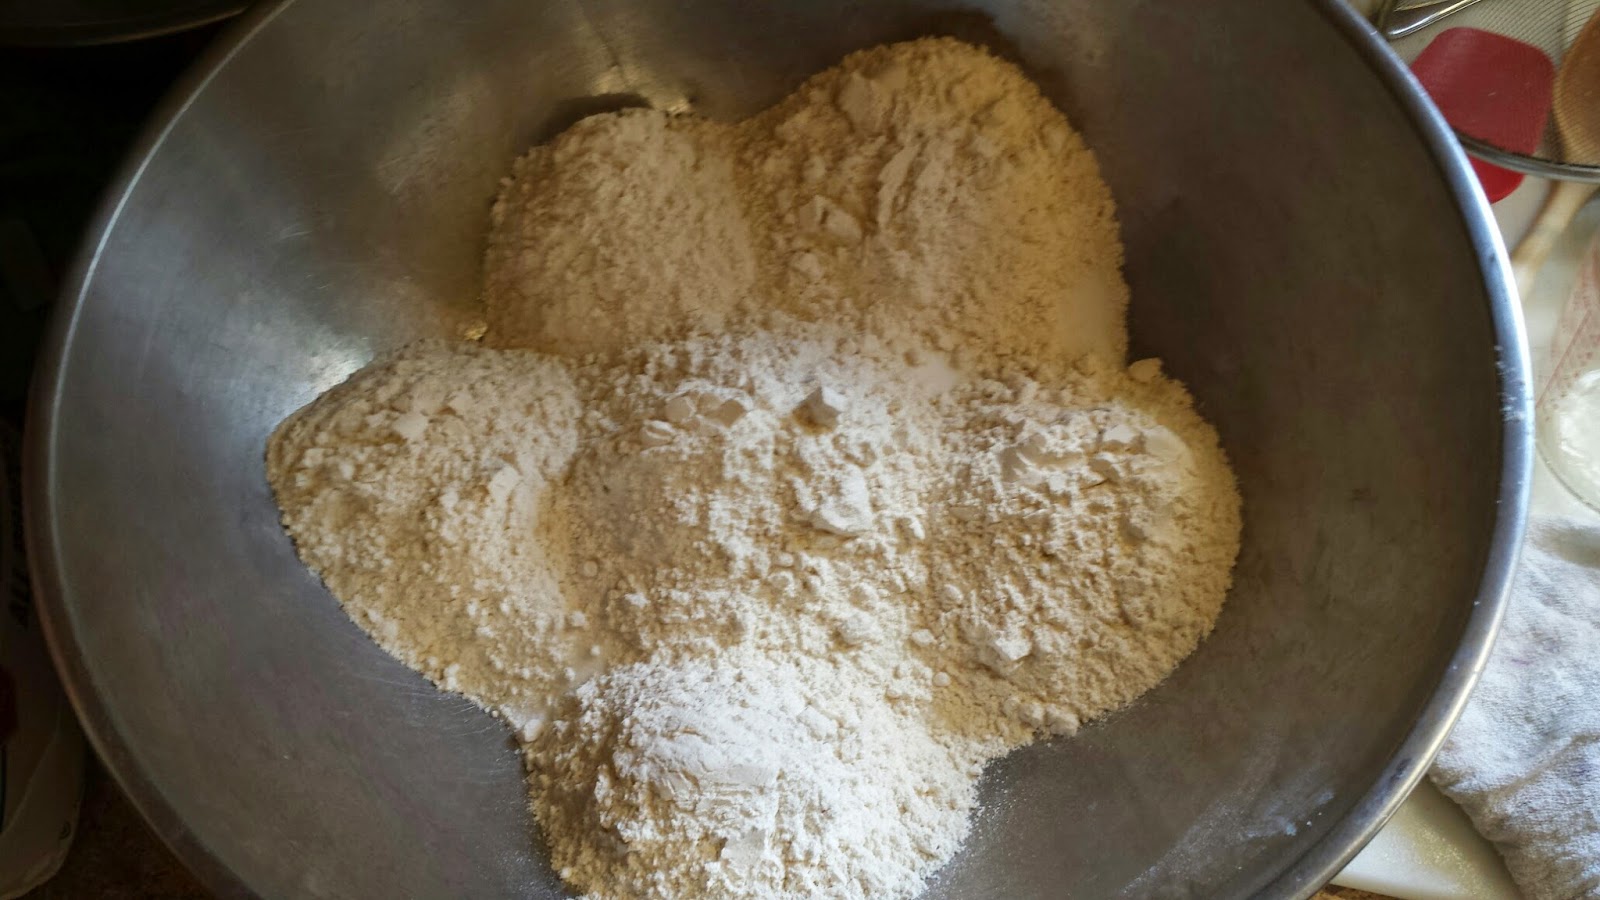
Once all of the dry ingredients are added to the bowl, I use a wire whisk to mix it all together.  


Push most of it to the sides to make a well in the center.


In another bowl, beat the eggs well.


Once the eggs are beaten, the oil is mixed in.  Set it aside with the dry ingredients, it's time to prep the pans.  After spraying the pans with Pam, sprinkle some of the cinnamon sugar mixture in the bottom of the pan, don't use it all as some goes on top of the bread before baking too.


Also, take a minute to mash some of the blueberries, not all of them, just some.  This will give the bread that "blueberry" color.  I just use a potato masher.


It's really hard to not grab a few of these as they sit there looking all yummy, but try to resist, you want the whole berries in the bread!  

((Just a side note here, frozen blueberries are a wonderful snack, in my humble opinion, even better than frozen grapes and they're a super food!))


Ok, back to it!  At this point, add the egg mixture to the dry ingredients.


Using a spatula or a big spoon, mix this just until it comes together.  Do NOT over mix it.  


It will be lumpy and bumpy and that's ok.  Next carefully fold in both the mashed blueberries and the whole ones.


Stop picking the blueberries out of the mix.  Wait, that's me.  LOL

Next, put it in the pans.  The recipe calls for using two full size bread pans but I use the mini loaf pans  You can get them at Walmart pretty inexpensively.  They fit in small Ziploc bags well and are perfect size to grab one at a time as needed.  If you want a full loaf, go for it.


Now is when you sprinkle the rest of the cinnamon-sugar mix on top.


Bake per the recipe, if you're using mini loaf pans, I generally start checking them about 10 minutes before the recipe says for a large loaf.  

It's important that when it comes out of the oven that you let the bread rest in the pan for at least 15 minutes before trying to take it out of the pan or it WILL fall apart.  It's worth the wait people!  


It's dark and crispy on the outside and moist and yummy on the inside.  These mini loaves freeze well and re-warm well in the microwave.  

Here's the actual recipe:

3 cups flour
1 tsp salt
1 tsp baking soda
1 Tbls cinnamon
2 cups sugar
½ tsp ground cloves
½ tsp nutmeg
3 eggs, well beaten
1 ¼ cups canola oil
2 pints blueberries (mash about 1 cup of these)
2 tsp lemon extract

COOKING INSTRUCTIONS

Heat oven to 350 degrees.
Grease and flour 2 - 9x5x3 inch loaf pans.
Mix ¼ cup of the sugar and ½ the cinnamon, sprinkle bottom of pans with this.
Place flour, salt, baking soda, sugar, cloves, nutmeg and the rest of the cinnamon in a large bowl. 
Make a well in the center of the dry ingredients.
Add eggs, oil and lemon extract to well.
Stir until dry ingredients are moistened.
Stir in all blueberries.  (Mashing some gives the bread a nice blueberry color).
Divide batter between the two prepared pans
Bake 60 minutes or until toothpick inserted in center comes out clean.
Cool 15 minutes in the pan.
Remove from pan.

Cool completely on wire rack.  

I hope you enjoy it as much as we do.  And if you're ever in Beech Grove, Indiana, stop by the Farmer's Market and say Hello!

Tuesday, August 26, 2014

Ribbons!

As everyone knows, I love, love, love the State Fair.  This year, I decided to finally take the plunge and enter some things in the contests.  I didn't do so bad, if I do say so myself!  LOL


In order, I got participation for entering my Strawberry-Vanilla jam in the President's contest.  I got second place for my Gram's biscuits.  I call them 1-2-3-4 biscuits...it helps me remember the ingredients.  I won third place for my Cherry jam and fourth place for my Strawberry-jalapeno jam.  The honorable mention ribbon is for my Strawberry bread.  

I entered a bunch of things, just for fun and I enjoyed reading the comment cards from the judges.  From the comment cards, my Alabama Blueberry Bread wasn't quite done in the very center (I generally make mini loaves but for the fair they had to be large loaves so I wasn't as accurate on that one) but had it been it was a unique enough recipe that I'm sure it would have won.  It WILL be back next year.

Gram's biscuits are amazingly easy, here's the recipe:


Biscuits


2 cups flour
1 tsp. salt
3 tsp. baking powder
¼ cup cold butter
¾ cup milk.

COOKING INSTRUCTIONS

Heat oven to 425 degrees.
Sift together flour, salt and baking powder.
Cut in cold butter with a pastry blender or two knives until mix resembles cornmeal.
Using a fork, stir in milk just until mixture pulls from side of bowl.
Turn out on lightly floured board.
Knead gently and minimally, touch as little as possible, just until it comes together.
Cut with biscuit cutter and place on ungreased sheet pan.
Bake for 9-11 minutes or until golden brown.

Notice 1=salt, 2 =flour, 3=baking powder and 4= 1/4+3/4 is 4/4....it's just how I remember the recipe.  LOL

An even better part of the fair was sharing it with these littles:


They had to get a pic with my jams


One of my favorite pics from the fair, my son and grandkids.  

In my next post, I'll share the recipe for the blueberry bread!

Monday, July 21, 2014

Psstt...I'm still here!

Hello everyone!  It's been a minute since I've stopped to write.  I've been so busy, sometimes it's just not funny.  Of course, the short Dude has had multiple camps this summer to keep him busy and the teen is keeping my schedule full with college visits.  School here starts on July 31st so we're getting all that back to school stuff done too.  Tired yet?  I am!

My little jam business is really hot this summer.  We've had a booth at the Beech Grove Farmer's Market this summer and it's been fabulous!  I love meeting so many new people.  The customer's are great and the vendors are amazing.  

If you get a chance to go to a local Farmer's Market, you really should.  There is nothing better than farm fresh produce that was more than likely picked within the past 24 hours.  It's also a great chance to try something new.  You might like leeks or kale or even rhubarb.  There can also be some pre-made items there as well.  You may find breads of various types or cakes, cupcakes, etc.  You just never know what you may find at a market. 

Check out Market near you!


Wednesday, June 11, 2014

Garden progression

Hello everone!  I hope you're all having a great day.  I'm working on more jams for the Farmer's Market that I'm involved with this year.  Today I'm de-seeding some raspberries and blackberries...I didn't shoot KitchenAid parts across the room this time either!  That's always a bonus!

I thought I'd share some of the progress of the new garden layout.  When it came time for the first weeding, it was relatively easy with the layout to do the bulk of it with the tiller.  These pictures are after just the tiller, I hadn't done anything else yet.


The corn.  Devon got a kick out of hearing that old farmer's adage of "knee high by the 4th of July" means a good corn crop.  Of course, I had to explain that they meant to an adult not a 10 year old!  LOL  They are planted with every 2 rows close together as my ex-Father-In-Law (a farmer) had shared with me that they need to pollinate with each other and have to be close enough together to touch.  

One extra hint on corn, if you have raccoons in the area, they'll know your corn is ready before you do and will snatch it.  You can interplant pumpkins with the corn, they don't like the feel of the leaves and they'll protect your corn.  Bonus, you get pumpkins.


I did lose one of these cantaloupe plants, I think we have critter visitors coming.  I'm trying to be positive and think it gives extra room for vines.


Cucumbers, my son's second favorite veggie in the garden.  In this area, I will probably go back through and hoe out those weeds between the plants.


Green beans.  I am not sure if I just had some that didn't come up or if it had something to do with the monsoon we had shortly after I planted them.  Regardless, I just went through at the two week mark and planted more beans in the bare spots as my succession plants.


The sweet potatoes.  I generally plant them in a circle so this row thing is new but they appear to be doing fine.


Peppers, the front are green (there are yellow and red over near the tomatoes) and the far ones are jalapenos.  I lost a couple in the center, I'll replace them soon.


Here is the cauliflower, it's a little small yet, but it will catch up.


And then there was broccoli!  Again, a little small but it will catch up.


Tomatoes!  We have Early Girl, Big Boy, Lemon Boy (yellow), Grape, and a beefsteak variety.  Devon also chose an heirloom variety that I can't for the life of me remember the name, but he wanted to grow it so we got it.

As you can see, the tilling between the plants isn't 100% (what weeding is?) but it's working so far.  


Here are the radishes that are ready to harvest, spinach is coming up behind them.  Once I harvest the radishes, I can plant more.  If you look closely, you can see that we have been regularly harvesting the lettuce.  It just seems to grow back!


The onions are coming along nicely.  I was honestly worried about them in a tub but so far, so good.  The carrots are looking great, it's time to thin them (and to weed it again).


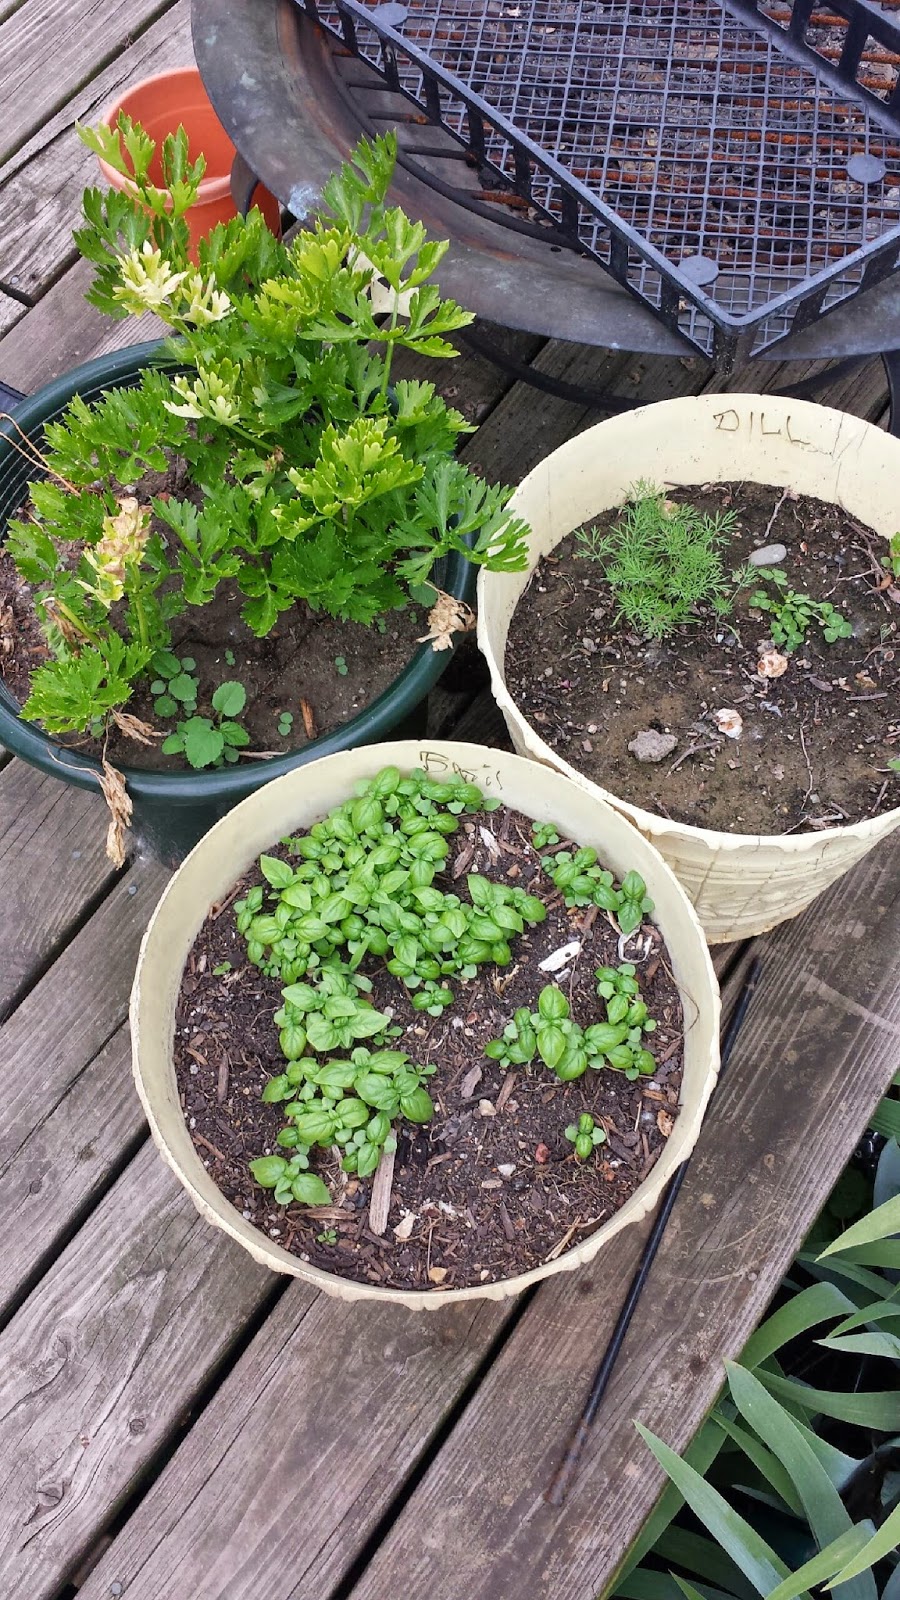
Some of the herbs are coming along great, but some are puny.  I think they'll be ok in the long run.  I have gotten a new mint plant as it didn't survive the winter we had.  I plant mint in pots because if you don't, it can (and will) take over your yard.  

I've not included pictures of my strawberry bed or my blackberry bed, both of them need weeded.  I'm not looking forward to doing the blackberries because if any of you have ever picked wild blackberries, you know those thorns are horrible!  

Always watch the clearance areas of anywhere that sells plants.  When my husband was at Lowe's, I wandered the garden center.  They had a clearance area and there was a bigger blueberry bush that needed a little TLC and a lot of water!  It was priced wrong (not marked down) and when I asked the manager about it, he just marked it to $5 since it was the last one they had.  I wasn't mad!  And now I have the start of my blueberry bed.  One step at a time!

How is your garden?  Even if it is only a few things, grow something!  

Wednesday, May 28, 2014

Getting the garden in!

As I share this year's garden with you all, I remind you that this garden is different than in year's past.  Sometimes, I feel like I am harping on this but I really, truly want to show people that you can garden no matter what.  You just have to find the way that works for you.

In deciding how to do this, without having to spend a lot of money in building raised (off the ground) beds or giving up being able to grow enough to put some veggies up for Winter, I found that I have gone back to the beginning.

Sure, my family gardened but it was not at our house, more of a community garden for the family at my Uncle's place.  There were so many adults that we were usually relegated to playing with our cousins and such.  Oh, and shucking corn.  That was ALWAYS a job that was left to the kids.  A job that my kids now do.  

When I first tried my hand at gardening as an adult, it was an abysmal failure.  I had no idea about soil consistency and that it's extremely hard to grow things in clay.  Even the weeds wouldn't grow in the clay.  I was crushed.

When we moved to a different home, I had the luck of not only not dealing with clay soil but that there was already a garden spot at the home.  I thought if there was a very, well used garden spot that a garden must have been successful there.  

I still remember as I was working on that first garden, I had my first garden book out, carefully writing down what I planted in each row.  A neighbor stopped by and was so amused that I was writing things down in a book.  He'd never seen anyone make a book.  At the time, I had no idea what the plants looked like so I was going to improvise.  I looked things up in books and copied them and pasted them next to my notes in my book.  Hey, I didn't want to pull up the plants thinking I was weeding...LOL.  

I also planted the plants and the rows far enough apart that I could take my little roto-tiller to weed not just between the rows but also around the plants (I hadn't learned to work a hoe yet and had a habit of chopping down plants...LOL).  I would weave between the plants up one way and the opposite back down the other.  No weeding necessary.

Anyway, I decided that this year, I would go back to those basics.  I did so because if I can't get out there to weed, I can at least take the outside tines off the roto-tiller I have now and weed in the way I did in the beginning.

Also keep in mind that you don't have to plant the entire garden in one day.  As you saw in my previous blog about container gardening, I did a little at a time.  I started with the containers and even those I planted over two days.  

Here's how the big garden went in.

Day One


Tomatoes:  Big Boy, Early Girl, Super Fantastic (my son's choice), Yellow Jubilee (Hubby's choice), Grape (also son's choice) and a Beef Steak variety

Day Two


Cabbage, Cauliflower, Broccoli, Sweet peppers, Jalapenos and Sweet Potatoes

Day Three


Although you can't really tell it, this is a row of cucumbers, a row of cantaloupe and the rest of this bed is green beans and corn.  This took all day for me to get it in.  Getting this many seeds in the ground is hard on the back.

Day Four


The rains came.  With hail.  Lots and lots of rain.  And hail.

I was convinced that I was going to have to replant the entire thing.  I was sure the seeds would be washed away and the newly planted plants ruined.  I was sure.

One week later


Corn, it's about 1 1/2 - 2 inches tall


Green beans, about 1 1/2" tall


On the left are onions and on the right are carrots (they need thinned...LOL)


One the left are radishes and spinach (hopefully) and on the right are the lettuces.  

So, everything survived the monsoon and hail we had.  I've left enough room between everything so that if (when) I get weeds, I can just run the tiller over them.

I'm looking forward to dinner tonight, I am going to cut some of that lettuce, pick a radish or two, I have carrots in the fridge and I grabbed some fresh tomatoes and cheese at the farmer's market this morning.  I'll grill a steak and dinner will be grilled flank steak salad.

So, how is your garden doing?  It's not too late to plant some things.


Monday, May 26, 2014

Happy Memorial Day!

Happy Memorial Day!  On this day that is generally thought of as the first day of Summer, I'd remind everyone to remember why we have this holiday.  Let us remember those who gave their lives for the freedoms we enjoy daily.  

I hope you are all enjoying this beautiful day!

Friday, May 23, 2014

After the Reception!

As I wrote about a couple of posts ago, the Hubby's reception was wonderful.  Even with the best laid plans for the food, there were leftovers.  Lots of them.  I tend to be a "have it and not need it" instead of a "need it and not have it" kind of person.  So, as far as food went, we didn't run out of anything but I did have leftovers.  I threw away as little as possible.

The sandwiches were easy enough, they were pre-made and in trays so when we got home, I just took the trays and covered tightly with foil and popped them in the freezer.  It will be easy on a weekend to pop a tray in the oven and have a quick, ready made lunch.

I took the left over veggie tray items and put them up for future uses.

The broccoli and cauliflower that were left, I steam blanched and then shocked them in ice water to stop the cooking and put them in good Ziplocs.  Pop them in the freezer for dinners later.

The sweet peppers, I just tossed into a Ziploc and popped them in the freezer to use for things like fried potatoes with peppers and onions or even just as additional seasoning in soups or stews.

I took the baby carrots, for some unknown reason, I bought FIVE pounds of these.  I have no idea what I was thinking...  Anyway, I cut them in half and ran them through a quick steam blanch and ice water shock.  Afterwards, I did let these air dry on clean towels so that I could put them in a large Ziploc and not have them end up as one large, cinder block-sized hunk of carrots.  They won't stick together if they're dry and I can pull out what I need.

I thought the grape tomatoes would be the hardest to deal with.  Of course, I bought a ton of those as well.  It seems you either buy a small one pound container or a big three pound box.  Evidently, people don't care for grape tomatoes as much as my son and I do.  I found this amazing recipe for pizza sauce.  It was a recipe for pasta but once it was done, it just tasted like it belonged on pizza.  It makes about 4 cups.  It's a recipe from Emeril LeGasse, here it is.  I made it and I did boil some pasta for a lunch but it was so good, I put the bulk of it up and we will have it on pizzas.


I pulled the fruit off the kebab sticks to just put in a bowl in the fridge as fruit salad but my husband and son picked out all the strawberries and made strawberry shortcakes for a snack...LOL.

I even took the extra Buffalo Chicken dip and the Spinach-Artichoke dip that I had made (This was the extra that was never heated up) I put in Ziplocs and put in the freezer for snacks later while watching a movie or a race or what have you.  By putting this extra dip in the smaller freezer bags, you don't have to heat up a whole lot of it at a time.  I also froze the left over salsa that I had made in Ziplocs.  

So, instead of just tossing so many extras with a little time and effort I have a few lunches, pizza fixings, side dishes and snacks for a later time.  Bonus!  

It is nice as well that since we camp, I have the left over plates, flatware, cups and napkins to put in the RV.  I won't have to do dishes when we camp.  Double Bonus!


Sunday, May 18, 2014

Fix it don't replace it!

It's no secret, I'm a tight ass....ummmm, I mean frugal, very frugal!  I love bargain hunting.  A while back, I found this great Wilson's Leathers laptop bag, it is actually called an "Icon Motorsports" Tote Purse and Laptop bag.  I love this bag!  I found it at a Goodwill half-price day sale and bought it for about $4.00.  Here is a picture of it I found on the Internet of how it looked when new.  


It's big enough to carry my normal "purse junk" and I can tuck a notebook and text book in or my tablet to take to class with me.  I won't lie, I carry a lot of "purse junk", my friend Peggy has said more than once she just wants to turn my bag upside down and empty it just to see what is actually in it...LOL.

Anyway, carrying all that junk put some major wear and tear on the handles.  Not only do they not make this bag anymore but the company is listed as being 'defunct' now so matching the straps to have it professionally repaired more than likely was NOT happening!  A couple of weeks ago, while in Lowe's with my husband, I got a brilliant idea.  My husband has learned to kinda hear me out on these ideas and will actually help me with the less hair-brained ones...LOL.  I was going to fix this rather than to try to find another bag I loved.  We found some screws that matched the rivets on the bag pretty closely.  


Forgive the dust, I didn't think to take a picture until after we'd drilled the first hole.  But this is what happens with it being loaded heavy and tossed around by the handles.

After actually emptying it, that took a while as I figured I'd clean it out while I did so...LOL.  Then my little Dremel tool was small enough and powerful enough to do the job in the confined interior of my bag.  We drilled a new hole in the leather, through the handle and the bag itself.  Sorry, there is no picture of the drilling as it took both of us to hold the bag open, the strap straight and actually drill the hole.

After drilling the hole, my hubby put the screw through and put a cheap nut on it.  


He did this so that he could use the Dremel cut off wheel to cut the extra length off the screw.  He said that doing it with a cheap nut on it would allow him to smooth down any little burr on the screw as he took the cheap nut off making it easier to put the permanent one on.


Yup, sparks flying out of my purse!  LOL.  After he cut the excess length off the screw, he took the cheap nut off and put the finish nut on.


I chose this nut because since it is rounded, I won't scratch myself or snag anything as I reach in and out of it.


I have added a little more life to my favorite bag!  To replace a leather laptop bag could be up to $300, I fixed my old one for under $7.00.  Is it perfect?  No but I am more than happy with it.  And I'm confident that it will last me at least until I finish college in a year!