With the holidays quickly approaching, we are all working to get everything ready in preparation for a wonderful time with our families. I know I'm running around like a crazy person trying to work, finish my semester in school, prepare for Christmas and 412 other things that are on my to-do list. I also know I am not alone in this.
As I was going through my son's 'take home folder' from school, there was a flyer in there reminding us that his school was sponsoring families through the Servant's Heart pantry in Beech Grove, where my son goes to school. They are a wonderful organization, they do great things in our area. HERE is the link to Servant's Heart if you'd like to learn more about them. They always welcome volunteers as well, my son's first time volunteering there was when he was 5. We worked in the store room and he sorted canned goods by item. So, even the young people are welcomed to help!
Back on topic.....we are blessed to have enough for the holidays. Not everyone is as fortunate. I would encourage you to donate to your local food pantry, shelter or other organization that helps families in need. They need food, clothing, presents for children, money and manpower!
Regardless of where you live, please find an organization that assists those in need. Consider helping an organization that works with families. Even if you can't give anything but your time, please consider giving something. Every little bit helps.
We're all in this together!
Thursday, December 10, 2015

Did-ya-know
Good morning all! I hope everyone is enjoying this very unseasonably warm weather we're having. How often, in Indiana, do you get to have your windows open two weeks before Christmas? I won't lie, it's making me a bit nervous about February's weather...LOL
I was talking with some Mom-friends about getting the kids to discuss school. We all know how asking "How was your day?" works. The only answers I ever got from my kids to that question was "Fine" or "OK". Getting information from them was like pulling teeth.
That's when we came up with "Did-ya-know". After school, my kids have to give me two "Did-ya-knows". This simply means they have to start the sentence with "Did you know..." and tell me something about their day that they think I might not know.
Sometimes, my Short Dude will get cute and try something like "Did you know for lunch we had pizza and it's my favorite?" Yea, he knows that won't work yet he will try it. He's cute...LOL
But most of the time, I get to really know about what he's doing in class. He'll share what is happening in the novel they're reading. Or that in Math, he got an 80% on a quiz and it would have been a 100% but he forgot to simplify. Just last week, I got a Science did-ya-know that was a very detailed breakdown of how a popcorn kernel has a small drop of water in it and the process that happens when that kernel is popped. He also described the differences in reactions in cooking. That cooking involves a physical change and baking involves a chemical change in the foods.
I learn far more about what my child is doing in school from him with the "Did-ya-know" system. There are even days where he can't wait for me to say "Lay some did-ya-knows on me"!
It took us a week or so to get in the habit of doing this daily and a little while longer for the kids to really get into the spirit of doing it. But several years later, and it has become a great way to initiate a conversation with my son and really allows us to spend some time just talking about his day.
I love how excited he gets when he is discussing something like a Science experiment they're doing.
And some days, I get things like "Did you know that (insert friend's name here) farted during Math?"
Oh, the joys of boys!
Anyway, try it, ask your kids to give you a couple of "did-ya-knows" about their day...you never know what you may learn!
I was talking with some Mom-friends about getting the kids to discuss school. We all know how asking "How was your day?" works. The only answers I ever got from my kids to that question was "Fine" or "OK". Getting information from them was like pulling teeth.
That's when we came up with "Did-ya-know". After school, my kids have to give me two "Did-ya-knows". This simply means they have to start the sentence with "Did you know..." and tell me something about their day that they think I might not know.
Sometimes, my Short Dude will get cute and try something like "Did you know for lunch we had pizza and it's my favorite?" Yea, he knows that won't work yet he will try it. He's cute...LOL
But most of the time, I get to really know about what he's doing in class. He'll share what is happening in the novel they're reading. Or that in Math, he got an 80% on a quiz and it would have been a 100% but he forgot to simplify. Just last week, I got a Science did-ya-know that was a very detailed breakdown of how a popcorn kernel has a small drop of water in it and the process that happens when that kernel is popped. He also described the differences in reactions in cooking. That cooking involves a physical change and baking involves a chemical change in the foods.
I learn far more about what my child is doing in school from him with the "Did-ya-know" system. There are even days where he can't wait for me to say "Lay some did-ya-knows on me"!
It took us a week or so to get in the habit of doing this daily and a little while longer for the kids to really get into the spirit of doing it. But several years later, and it has become a great way to initiate a conversation with my son and really allows us to spend some time just talking about his day.
I love how excited he gets when he is discussing something like a Science experiment they're doing.
And some days, I get things like "Did you know that (insert friend's name here) farted during Math?"
Oh, the joys of boys!
Anyway, try it, ask your kids to give you a couple of "did-ya-knows" about their day...you never know what you may learn!
Saturday, November 21, 2015
Fried biscuits and apple butter
This morning in Indiana, we have our first snow flakes falling of the season. November 21st and we're just now seeing snow, not anything accumulating but a few flakes here and there. We're lucky we've gotten this far into the season without seeing more!
In our home, there are only a couple of things that truly say breakfast comfort food, biscuits and gravy and fried biscuits and apple butter. We find there are a lot of people who haven't had the wonderful luck to experience fried biscuits and apple butter. If you are one of these people, you should correct that situation, immediately!
The best thing about this, besides the warm & fuzzy childhood memories, is that it is quick and easy and the kids absolutely love it!
Usually, I make homemade biscuits for everything except fried biscuits and monkey bread. They both seem to have a better end result if you use the canned biscuits. And usually, the cheaper the can of biscuits, the better.
I generally get whatever is cheapest, I had a coupon so I started with these biscuits today.


 .
.


In our home, there are only a couple of things that truly say breakfast comfort food, biscuits and gravy and fried biscuits and apple butter. We find there are a lot of people who haven't had the wonderful luck to experience fried biscuits and apple butter. If you are one of these people, you should correct that situation, immediately!
The best thing about this, besides the warm & fuzzy childhood memories, is that it is quick and easy and the kids absolutely love it!
Usually, I make homemade biscuits for everything except fried biscuits and monkey bread. They both seem to have a better end result if you use the canned biscuits. And usually, the cheaper the can of biscuits, the better.
I generally get whatever is cheapest, I had a coupon so I started with these biscuits today.

That is apple butter that I make, you certainly can use store-bought apple butter but, honestly, if you can get your hands on homemade apple butter (even if it's not Gram's Jams), please do so! You'll thank me.
Other than oil, that IS the ingredient list. Biscuits, Apple Butter and Oil. You don't even have to measure. You do have to cut the biscuits into little pieces. Well, you don't have to, but there is more crispy surface to the biscuits if you do.

You can use a deep fryer and I do if I have mine out but a skillet will do the same job. As always, I highly endorse cast iron, but any skillet will do. Place about 1/2"-3/4" oil in the pan. Be careful doing this, if you have a shallower skillet, go with the smaller amount of oil.
Before you start frying, get a plate or I use a pie pan, with a paper towel in it to drain them on. You can use a sheet pan with a cooling rack on it to drain the oil if you like. I do both, depending on the mood.
Start heating the oil in the skillet, get your tongs, spider, slotted spoon, whatever you want to use to pull them out of the oil when they're done. Get all this together before you start frying as it will move quickly once you start.
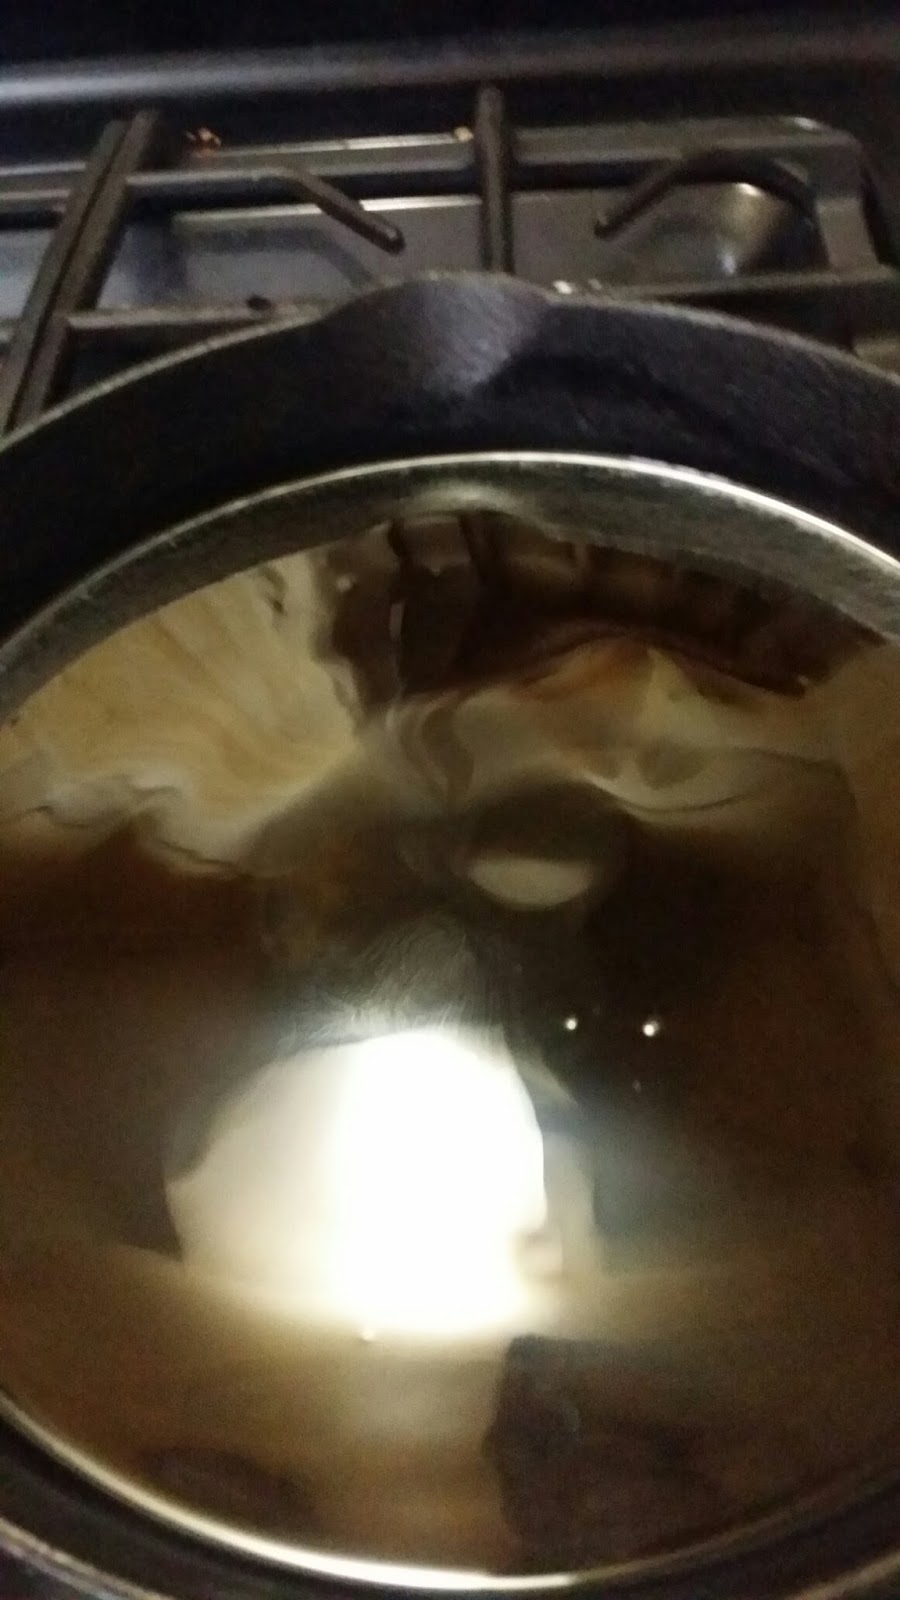

Once the oil is hot, I cook just one just like when you make pancakes and make that one little one first. This is just to make sure the oil is hot enough but not too hot.

Once this is done and your oil is good to go, carefully put the biscuits in the oil. Be careful to not overload the pan. They'll cook quick enough without having to put too much in the skillet.

They will cook quickly

While they cook, put the apple butter in dishes that let you dip in them. You can heat the apple butter a bit in the microwave.

Let the first batch drain while you cook the second.

Then just plate and serve.

The amount of pictures make this seem time consuming, but it really isn't. I made these for breakfast in about 10-15 minutes.
They are sooooo yummy!
Friday, November 20, 2015
Prepping for AFTER-Thanksgiving!
No, I don't mean Black Friday! LOL I mean the leftovers!
We take such care in planning every dish that hits the Thanksgiving table...so much food! And yet, few think of the leftovers. Let those leftovers become planned overs! It just takes a little planning.
Let's just talk about the turkey itself for the moment. Everyone loves that turkey sandwich on a dinner roll for lunch the next day, no doubt about it! There's much more that you can do though. First, obviously, slice as much of the turkey off of the carcass as you can. After you slice up you can, it's time to pick the rest of the meat off. You know those little bits that you can't really cut but get as much as you can.
Then I take the carcass and put it in a large stockpot. If you don't have a big stockpot, break the carcass down to smaller pieces and use part of it in whatever pot you have that it fits in. I put an onion and some carrots and celery and some peppercorns in the water. I'll bring this to a boil and then reduce the heat to a slow simmer. And I let it simmer for a good while, until the liquid reduces. Once the stock has reduced and it tastes wonderful, turn off the burner and let it cool.
While you're waiting on the stock to cook, portion out the turkey into good Ziploc freezer bags. Think of the meals that your family likes to eat and portion the meat to fit that meal. Around here, turkey Manhattans are a must! So, portion out what you need for each meal until you run out of the sliced turkey. When you seal up the Ziplocs, try to get as much air out of the bags as you can. Be sure to label the Ziploc with what it is, what meal it's portioned for and the date.
With the shredded, or picked over, turkey, again, portion it out into Ziploc bags. You can use this for turkey soup, turkey & dumplings, turkey salad, etc. We interchange turkey with chicken but I know a lot of people who don't like to substitute it but use your imagination. Then portion, label and date the bags of shredded turkey.
Once the stock is cooled, strain it well. I put it in gallon Ziploc bags as well. Again, label and date it. If you have a bit left (or plan on it) I put a small amount, maybe 2-3 cups in a bag separately to use to make Turkey gravy for the Manhattans. It makes it extra yummy! I don't think I need to tell you to be sure it is sealed well! You can use freezer safe containers if you'd like, I just prefer Ziplocs. As I always say, if you're going to use freezer bags, get good quality ones. I prefer Ziplocs, they cost a bit more than store brands (use a coupon to offset that!) but it's protecting your food in the freezer, so get good ones.
I always pack the bags in such a way that they lay flat in the freezer. You'll get more in the freezer if they will lay flat on top of each other. Be sure things are cool before you put them in the freezer or they will stick together in terrible ways!
So, even if you think your family ate all the turkey, you can still get a meal or two or three from what's left on the carcass.
If you have extra rolls, you can freeze those too and reheat later. If your family is anything like mine, it doesn't matter how many rolls you make, there will be none left over...my brothers usually make sure of that.
Extra gravy can be frozen, I don't necessarily like the gravy thawed (that's why I put some stock up to make fresh gravy) but you can add the gravy you froze to stock for extra flavor.
Extra mashed potatoes can be used for potato pancakes or as a thickener for cream based soups.
Extra veggies that aren't creamed or sauced, can be put up in the freezer to add to vegetable soup later. In fact, I will keep a Mason jar in the freezer and add that extra corn or green beans or whatever that is left after meals and when the jar is full, it's the perfect amount for a pot of veggie soup. Side note...I'll also chop or shred and freeze left over beef or steak for veggies soup too.
So, use your imagination. Plan now. When you think of what dishes will be on your Thanksgiving table, think also of what you can do with any that you have left. Make sure you have some Ziplocs on hand to put things up.
In my mind, this is more than just saving money. The amount of food that is wasted in this country on holidays is shameful. I'm not by any means saying that one should not have a feast to celebrate our holidays with our loved ones, but try to plan so that you aren't wasting food.
On that same train of thought, please, PLEASE consider donating something, anything, to those who are helping the less fortunate. There are families that wouldn't have a holiday meal without the help of a food bank, shelter, church, etc. If you are unable to donate cash, even a can or two of veggies, a jar of gravy, or other canned goods will help. Every little bit helps.
If you are not able to donate cash or items, consider donating your time. Even an hour can help to sort and organize the items in the food pantry to make things easier for distribution. My son was 5 the first time he did this, they'll appreciate your help, trust me. We're all in this world together, we need to remember this and to help out those who aren't as fortunate as we are.
We take such care in planning every dish that hits the Thanksgiving table...so much food! And yet, few think of the leftovers. Let those leftovers become planned overs! It just takes a little planning.
Let's just talk about the turkey itself for the moment. Everyone loves that turkey sandwich on a dinner roll for lunch the next day, no doubt about it! There's much more that you can do though. First, obviously, slice as much of the turkey off of the carcass as you can. After you slice up you can, it's time to pick the rest of the meat off. You know those little bits that you can't really cut but get as much as you can.
Then I take the carcass and put it in a large stockpot. If you don't have a big stockpot, break the carcass down to smaller pieces and use part of it in whatever pot you have that it fits in. I put an onion and some carrots and celery and some peppercorns in the water. I'll bring this to a boil and then reduce the heat to a slow simmer. And I let it simmer for a good while, until the liquid reduces. Once the stock has reduced and it tastes wonderful, turn off the burner and let it cool.
While you're waiting on the stock to cook, portion out the turkey into good Ziploc freezer bags. Think of the meals that your family likes to eat and portion the meat to fit that meal. Around here, turkey Manhattans are a must! So, portion out what you need for each meal until you run out of the sliced turkey. When you seal up the Ziplocs, try to get as much air out of the bags as you can. Be sure to label the Ziploc with what it is, what meal it's portioned for and the date.
With the shredded, or picked over, turkey, again, portion it out into Ziploc bags. You can use this for turkey soup, turkey & dumplings, turkey salad, etc. We interchange turkey with chicken but I know a lot of people who don't like to substitute it but use your imagination. Then portion, label and date the bags of shredded turkey.
Once the stock is cooled, strain it well. I put it in gallon Ziploc bags as well. Again, label and date it. If you have a bit left (or plan on it) I put a small amount, maybe 2-3 cups in a bag separately to use to make Turkey gravy for the Manhattans. It makes it extra yummy! I don't think I need to tell you to be sure it is sealed well! You can use freezer safe containers if you'd like, I just prefer Ziplocs. As I always say, if you're going to use freezer bags, get good quality ones. I prefer Ziplocs, they cost a bit more than store brands (use a coupon to offset that!) but it's protecting your food in the freezer, so get good ones.
I always pack the bags in such a way that they lay flat in the freezer. You'll get more in the freezer if they will lay flat on top of each other. Be sure things are cool before you put them in the freezer or they will stick together in terrible ways!
So, even if you think your family ate all the turkey, you can still get a meal or two or three from what's left on the carcass.
If you have extra rolls, you can freeze those too and reheat later. If your family is anything like mine, it doesn't matter how many rolls you make, there will be none left over...my brothers usually make sure of that.
Extra gravy can be frozen, I don't necessarily like the gravy thawed (that's why I put some stock up to make fresh gravy) but you can add the gravy you froze to stock for extra flavor.
Extra mashed potatoes can be used for potato pancakes or as a thickener for cream based soups.
Extra veggies that aren't creamed or sauced, can be put up in the freezer to add to vegetable soup later. In fact, I will keep a Mason jar in the freezer and add that extra corn or green beans or whatever that is left after meals and when the jar is full, it's the perfect amount for a pot of veggie soup. Side note...I'll also chop or shred and freeze left over beef or steak for veggies soup too.
So, use your imagination. Plan now. When you think of what dishes will be on your Thanksgiving table, think also of what you can do with any that you have left. Make sure you have some Ziplocs on hand to put things up.
In my mind, this is more than just saving money. The amount of food that is wasted in this country on holidays is shameful. I'm not by any means saying that one should not have a feast to celebrate our holidays with our loved ones, but try to plan so that you aren't wasting food.
On that same train of thought, please, PLEASE consider donating something, anything, to those who are helping the less fortunate. There are families that wouldn't have a holiday meal without the help of a food bank, shelter, church, etc. If you are unable to donate cash, even a can or two of veggies, a jar of gravy, or other canned goods will help. Every little bit helps.
If you are not able to donate cash or items, consider donating your time. Even an hour can help to sort and organize the items in the food pantry to make things easier for distribution. My son was 5 the first time he did this, they'll appreciate your help, trust me. We're all in this world together, we need to remember this and to help out those who aren't as fortunate as we are.
Monday, October 12, 2015
Closing the Garden
Hello everyone!
Before we get into how to close your garden up for the Winter, I want to take a minute to ramble...
I've struggled a lot this Spring/Summer with the fact that I can no longer have a big garden. My Asthma has gotten so bad that I just can't devote the time outside that the garden needs in the Summer time. I won't lie, at first I was pretty angry about it. I'm not a perfect gardener but I loved it. It was awesome to watch the garden grow and progress over the months from seedling to produce. Add to that the money saved at the grocery, the quality of fresh produce and the added benefit of fresh air and sunshine and it didn't get much better. It was a somewhat bitter pill to swallow. My husband, bless his heart, planted some tomato plants for me to be able to just go grab some fresh right before dinner.
With my jam business, I was spending time at different Farmer's Markets a couple of times a month. I would take a few minutes and wander around checking out things and talking with the other vendors. I found wonderful produce, local cheese, flavored dried pastas as well as some other pretty amazing things. We tried things that we wouldn't necessarily have tried had I been gardening and not taking the time to explore the various Farmer's Markets. It took me a while to figure out how to "make the lemonade when I got the lemons handed to me" but I finally figured it out. Talking to, and getting to know, the farmers helps you to figure out who really grows their stuff and who acts as a middle man for someone else. You can learn about how things are grown, the processes used (organic or not, pesticide free or not, etc.) and where your food comes from. It's fun, try it at the next market you visit. You ARE visiting them, right??? LOL
Back to the garden...
A lot of people think that once your garden stops bearing produce that you're done. You could be but if you take the time to "put the garden to bed" for Winter, you not only make your garden healthier but it sure does make the Spring easier to deal with. Around here, it very well can be quite rainy and muddy in the Spring. It's no fun to have to sludge through all that to pull last season's plants and get the soil ready for new plants. There have been years where it is quite late before you can till the ground up. Taking a little time right after the first good, hard frost will make the next Spring much, MUCH easier to deal with.
It's really not that hard to do either. To start, just simply pull up any plants that remain in the garden, these will be great additions to your compost pile if you have one. If you do have a compost pile, lay these spent plants aside for now, you'll add them to the compost pile later.
Next, add some compost to the garden. If you don't have a compost pile, you can buy it in bags or in bulk if you have a truck to haul it in. This will add nutrients to the garden now and save you a little work next Spring. Now, run the tiller and get the compost worked into the soil well. This tilling also helps to eliminate some weeds in the Spring. Personally, I'd go through at this point and rake it somewhat flat, if you're using border free raised beds (see the pic of how I used to garden in this blog post to see what I mean), rake the beds back into place. At this point you can put the plants and things you pulled up into your compost pile, if you have one.
Then, you could plant "cover crops" like rye, clover, etc., but I have never done that. I'll admit, it seems like a lot of extra work to prep the ground and plant something that I'm simply going to till under next Spring. Since I've added compost to the garden before tilling it, I do something a bit different that does double duty in my opinion. I cover the garden with straw, it's cheap and easy to toss on the garden. In the Spring, you can rake it off the beds (or area you're going to plant in) and use it to cover walkways for the muddiness that tends to be Indiana Springtime. Once Spring comes, it's nice to be able to go to the garden and rake away the straw and the garden is pretty much ready to start.
One final thing that I do is to review my Garden book. If I haven't slacked over the course of the growing season, I've made notes that include what and how much of something I planted where (because crop rotation is important), what worked well where, if I had enough or too much of any one item. I'll review these notes and make any additional notes or reminders for next year. I know the book (just a spiral bound notebook for me) sounds silly, but I sometimes don't remember what happened yesterday let alone what happened with my tomatoes two years ago when they were planted near the fence.
Have a great day!
Before we get into how to close your garden up for the Winter, I want to take a minute to ramble...
I've struggled a lot this Spring/Summer with the fact that I can no longer have a big garden. My Asthma has gotten so bad that I just can't devote the time outside that the garden needs in the Summer time. I won't lie, at first I was pretty angry about it. I'm not a perfect gardener but I loved it. It was awesome to watch the garden grow and progress over the months from seedling to produce. Add to that the money saved at the grocery, the quality of fresh produce and the added benefit of fresh air and sunshine and it didn't get much better. It was a somewhat bitter pill to swallow. My husband, bless his heart, planted some tomato plants for me to be able to just go grab some fresh right before dinner.
With my jam business, I was spending time at different Farmer's Markets a couple of times a month. I would take a few minutes and wander around checking out things and talking with the other vendors. I found wonderful produce, local cheese, flavored dried pastas as well as some other pretty amazing things. We tried things that we wouldn't necessarily have tried had I been gardening and not taking the time to explore the various Farmer's Markets. It took me a while to figure out how to "make the lemonade when I got the lemons handed to me" but I finally figured it out. Talking to, and getting to know, the farmers helps you to figure out who really grows their stuff and who acts as a middle man for someone else. You can learn about how things are grown, the processes used (organic or not, pesticide free or not, etc.) and where your food comes from. It's fun, try it at the next market you visit. You ARE visiting them, right??? LOL
Back to the garden...
A lot of people think that once your garden stops bearing produce that you're done. You could be but if you take the time to "put the garden to bed" for Winter, you not only make your garden healthier but it sure does make the Spring easier to deal with. Around here, it very well can be quite rainy and muddy in the Spring. It's no fun to have to sludge through all that to pull last season's plants and get the soil ready for new plants. There have been years where it is quite late before you can till the ground up. Taking a little time right after the first good, hard frost will make the next Spring much, MUCH easier to deal with.
It's really not that hard to do either. To start, just simply pull up any plants that remain in the garden, these will be great additions to your compost pile if you have one. If you do have a compost pile, lay these spent plants aside for now, you'll add them to the compost pile later.
Next, add some compost to the garden. If you don't have a compost pile, you can buy it in bags or in bulk if you have a truck to haul it in. This will add nutrients to the garden now and save you a little work next Spring. Now, run the tiller and get the compost worked into the soil well. This tilling also helps to eliminate some weeds in the Spring. Personally, I'd go through at this point and rake it somewhat flat, if you're using border free raised beds (see the pic of how I used to garden in this blog post to see what I mean), rake the beds back into place. At this point you can put the plants and things you pulled up into your compost pile, if you have one.
Then, you could plant "cover crops" like rye, clover, etc., but I have never done that. I'll admit, it seems like a lot of extra work to prep the ground and plant something that I'm simply going to till under next Spring. Since I've added compost to the garden before tilling it, I do something a bit different that does double duty in my opinion. I cover the garden with straw, it's cheap and easy to toss on the garden. In the Spring, you can rake it off the beds (or area you're going to plant in) and use it to cover walkways for the muddiness that tends to be Indiana Springtime. Once Spring comes, it's nice to be able to go to the garden and rake away the straw and the garden is pretty much ready to start.
One final thing that I do is to review my Garden book. If I haven't slacked over the course of the growing season, I've made notes that include what and how much of something I planted where (because crop rotation is important), what worked well where, if I had enough or too much of any one item. I'll review these notes and make any additional notes or reminders for next year. I know the book (just a spiral bound notebook for me) sounds silly, but I sometimes don't remember what happened yesterday let alone what happened with my tomatoes two years ago when they were planted near the fence.
Have a great day!
Sunday, July 5, 2015
Farmer's Markets and Blackberry Scones!
Even back when I had a huge garden, I still loved going to Farmer's Markets. You can always find something new to try whether that is something you don't grow yourself or some yummy goodness that a vendor made. A nice bonus is that you're never 100% sure what you'll find until you get there!
Since my health won't let me have a big garden anymore (Asthma truly sucks), I've grown to love the Farmer's Markets even more. I pay a little more than it cost for me to grow my own, but in the big picture, it's worth it as I still get fresh, local produce.
This past weekend, the hubby and I visited a market on Saturday morning before we had to pick up the Short Dude from summer camp. The particular market had a coffee vendor, so my morning was even better! Hubby found a vendor who had blackberry scones. He bought a couple and liked them so much that he went and bought the remaining 3 they had left.
So I searched and found a recipe for them. I'd never made scones before and surprisingly, they were much easier to make than I'd realized. They're really nothing more than fancy biscuits! I used this recipe, and I think it turned out pretty good.
Here's what's involved:

Oh, I forgot this in the pic....

I had the blackberries in the freezer (forgot to get a pic of them before) but the recipe called for putting some flour on the frozen berries, mixing them and putting them back in the freezer until later. Thawed berries will not only get mushy but turn the whole recipe purple.


It starts easy enough with the dry ingredients and cutting in the butter. Now, my Gram was amazing in the kitchen and could use her hands to cut the butter in, I'm not that good. I also never got the hang of using a pastry cutter. It should be easy but I just can't...LOL. I use two knives to do it. It's easy and I don't need extra gadgets in my kitchen.

 This next step is what makes the dough so rich and yummy! You mix the half and half with vanilla. I use Vanilla-Bean paste for anything that calls for vanilla now, it's so yummy. I get it on Amazon, click here to find it! I buy it in large bottles for my jam business but you can get it in smaller quantities.


At this point, use your hands to gently mix in the frozen, floured berries. Flour your hands, it won't prevent any of the mix from sticking but it will help.


Once the berries are mixed in, somewhat, again, don't over mix it! Turn it out onto a floured surface. Don't knead it, just kinda pat it into a square.

Cut the square into fourths. Then, cut each fourth in half diagonally.

I put them on a sheet pan lined with parchment paper. You don't have to use parchment, but I didn't want to have to scrub the berries that will inevitably ooze out of the scones and bake onto the sheet.

Then you take the last tablespoon of butter and cut it into 8 pieces and put each little piece on top of the scones.


I set the cooling rack over a sheet of wax paper

The glaze is so simple. It was just a cup of powdered sugar and the juice of a lemon whisked together.

I just used a spoon to drizzle the glaze over the still-hot scones. You could use less if you like or even make more and for a heavier glaze but I think this was just the right amount. This is where the wax paper under the cooling rack comes in handy to avoid a messy clean up!

Once they cooled, this is how they looked

The next time I make them, I'll probably cut the triangles in half again as I'd like them to be a bit smaller. They were flaky like biscuits and the lemon in the glaze plays off the blackberries well. In the background is that hint of vanilla. All together, they are delicious! Hubby and the Short Dude gave it two thumbs up and asked what other fruits I could make them with. I'm thinking it would work with any berry, and the glaze can be made with lemon or even just milk (or more half & half). My son wants me to make them with chocolate chips...LOL
Enjoy!
Since my health won't let me have a big garden anymore (Asthma truly sucks), I've grown to love the Farmer's Markets even more. I pay a little more than it cost for me to grow my own, but in the big picture, it's worth it as I still get fresh, local produce.
This past weekend, the hubby and I visited a market on Saturday morning before we had to pick up the Short Dude from summer camp. The particular market had a coffee vendor, so my morning was even better! Hubby found a vendor who had blackberry scones. He bought a couple and liked them so much that he went and bought the remaining 3 they had left.
So I searched and found a recipe for them. I'd never made scones before and surprisingly, they were much easier to make than I'd realized. They're really nothing more than fancy biscuits! I used this recipe, and I think it turned out pretty good.
Here's what's involved:

Oh, I forgot this in the pic....

I had the blackberries in the freezer (forgot to get a pic of them before) but the recipe called for putting some flour on the frozen berries, mixing them and putting them back in the freezer until later. Thawed berries will not only get mushy but turn the whole recipe purple.


It starts easy enough with the dry ingredients and cutting in the butter. Now, my Gram was amazing in the kitchen and could use her hands to cut the butter in, I'm not that good. I also never got the hang of using a pastry cutter. It should be easy but I just can't...LOL. I use two knives to do it. It's easy and I don't need extra gadgets in my kitchen.


Gently mix the half & half/vanilla mixture into the flour. Don't over mix it! It will look like this, it doesn't look mixed well but trust me here.


Once the berries are mixed in, somewhat, again, don't over mix it! Turn it out onto a floured surface. Don't knead it, just kinda pat it into a square.

Cut the square into fourths. Then, cut each fourth in half diagonally.

I put them on a sheet pan lined with parchment paper. You don't have to use parchment, but I didn't want to have to scrub the berries that will inevitably ooze out of the scones and bake onto the sheet.

Then you take the last tablespoon of butter and cut it into 8 pieces and put each little piece on top of the scones.

Bake them for about 15-17 minutes at 425 degrees. They come out looking like this


The glaze is so simple. It was just a cup of powdered sugar and the juice of a lemon whisked together.

I just used a spoon to drizzle the glaze over the still-hot scones. You could use less if you like or even make more and for a heavier glaze but I think this was just the right amount. This is where the wax paper under the cooling rack comes in handy to avoid a messy clean up!

Once they cooled, this is how they looked

The next time I make them, I'll probably cut the triangles in half again as I'd like them to be a bit smaller. They were flaky like biscuits and the lemon in the glaze plays off the blackberries well. In the background is that hint of vanilla. All together, they are delicious! Hubby and the Short Dude gave it two thumbs up and asked what other fruits I could make them with. I'm thinking it would work with any berry, and the glaze can be made with lemon or even just milk (or more half & half). My son wants me to make them with chocolate chips...LOL
Enjoy!
Thursday, May 28, 2015
I'm still here!
Hello everyone! I'm still here! I got through the end of the semester and graduated with my Bachelor's. I guess I'm a glutton for punishment as I am going back for Grad school. Yikes!
I have had to come to face the fact that I can't handle the garden with my health. By the way, Asthma and allergies suck a big one. I was not going to plant a garden at all, but my wonderful husband did the work to get a small one ready. He tilled the smaller of my two big beds and we planted a few tomatoes, some broccoli and cauliflower, cucumbers and we're using the containers again this year for lettuce and salad things. It's not large by any means but we'll eat fresh stuff at meals.
I still intend on canning.
This is where one thing I always tell people is going to come in handy. When you go to Farmer's Markets or U-pick places, get to know your farmers and produce vendors. Make friends with them. They'll be able to tell you how to pick the best produce, new ideas on how to use it and even leads to where you can find things they don't sell. The farmers know each other, know of each other. They can be great resources.
We've met some wonderful farmers and vendors while visiting the various markets and I'm going to get produce from them. I know their farming practices, know how they grow things. I know where they grow them. I will still be able to get quality produce in quantity to can, I just won't have to do the extra work in the garden. I enjoy gardening, I just enjoy breathing a little more...LOL.
So, even though it is a little early for Farmer's Markets to have a full selection of produce in central Indiana, still visit them. Meet the people. Make friends. You may find some baked goodies or some craft items while you're there!
I have had to come to face the fact that I can't handle the garden with my health. By the way, Asthma and allergies suck a big one. I was not going to plant a garden at all, but my wonderful husband did the work to get a small one ready. He tilled the smaller of my two big beds and we planted a few tomatoes, some broccoli and cauliflower, cucumbers and we're using the containers again this year for lettuce and salad things. It's not large by any means but we'll eat fresh stuff at meals.
I still intend on canning.
This is where one thing I always tell people is going to come in handy. When you go to Farmer's Markets or U-pick places, get to know your farmers and produce vendors. Make friends with them. They'll be able to tell you how to pick the best produce, new ideas on how to use it and even leads to where you can find things they don't sell. The farmers know each other, know of each other. They can be great resources.
We've met some wonderful farmers and vendors while visiting the various markets and I'm going to get produce from them. I know their farming practices, know how they grow things. I know where they grow them. I will still be able to get quality produce in quantity to can, I just won't have to do the extra work in the garden. I enjoy gardening, I just enjoy breathing a little more...LOL.
So, even though it is a little early for Farmer's Markets to have a full selection of produce in central Indiana, still visit them. Meet the people. Make friends. You may find some baked goodies or some craft items while you're there!
Subscribe to:
Posts (Atom)